
ShelterLogic 10×10 Shed in a Box: A Comprehensive Assembly Guide
This guide details ShelterLogic 10×10 shed assembly, referencing available instructions and manuals for a smooth install, avoiding common pitfalls during the process.
The ShelterLogic 10×10 Shed-in-a-Box offers a convenient, cost-effective storage solution for various outdoor needs. This shed is designed for relatively straightforward assembly, making it an appealing option for DIY enthusiasts. However, successful installation hinges on careful preparation and adherence to the provided instructions.
Numerous online resources, including step-by-step videos and user manuals, are available to assist with the build process. These resources highlight the importance of inventorying all parts before commencing assembly, ensuring nothing is missing. It’s crucial to understand that while marketed as “easy,” the shed benefits from a methodical approach.
Many users recommend deviating from the original instructions in favor of simpler techniques discovered through online communities. The ShelterLogic shed is versatile, with specific models like the 10×10 UTV shed catering to specialized storage requirements. Proper installation is vital, especially considering potential hazards like snow and ice accumulation.
Unboxing and Inventory of Parts
Upon receiving your ShelterLogic 10×10 Shed-in-a-Box, the first critical step is a thorough unboxing and inventory. Before beginning assembly, carefully unpack all components and compare them against the parts list included in the user manual. This proactive step prevents frustrating delays mid-construction due to missing pieces.
Online resources consistently emphasize the importance of this initial check. Discrepancies should be reported immediately to ensure timely replacements. The kit typically includes the shed cover, frame components (base rails, upright poles, overhead poles), hardware (bolts, screws, anchors), and door components.
Pay close attention to the quantity and type of each fastener. Familiarize yourself with the different parts; understanding their function will streamline the assembly process. Several users have noted that some hardware may be similar in appearance, so careful identification is key. A complete inventory sets the foundation for a successful build.
Safety Precautions During Assembly
Prioritizing safety during ShelterLogic 10×10 Shed assembly is paramount. Always read and understand the complete user manual before commencing work. Instructions repeatedly warn against installing the shed near structures that could shed snow or ice, posing a significant hazard. Wear appropriate personal protective equipment (PPE), including gloves and eye protection, to prevent injuries from hardware and frame components.
Be mindful of pole ends during frame construction, as they can be sharp. Securely bolt overhead poles, paying attention to proper alignment to avoid instability. Work on a level surface to prevent the structure from shifting during assembly.
If working alone, enlist assistance for lifting heavier components. Avoid assembly during inclement weather, particularly high winds. Regularly inspect all connections to ensure they remain tight and secure. Following these precautions will contribute to a safe and successful shed installation.

Foundation and Frame Assembly
Assembly begins with ground preparation and a stable base frame, followed by constructing vertical supports and securely bolting overhead poles together for stability.
Preparing the Ground for Installation
Before beginning ShelterLogic shed assembly, proper ground preparation is crucial for stability and longevity. Select a level area, avoiding slopes that could compromise the structure. Clear the chosen site of all debris – rocks, roots, and vegetation – ensuring a smooth surface.
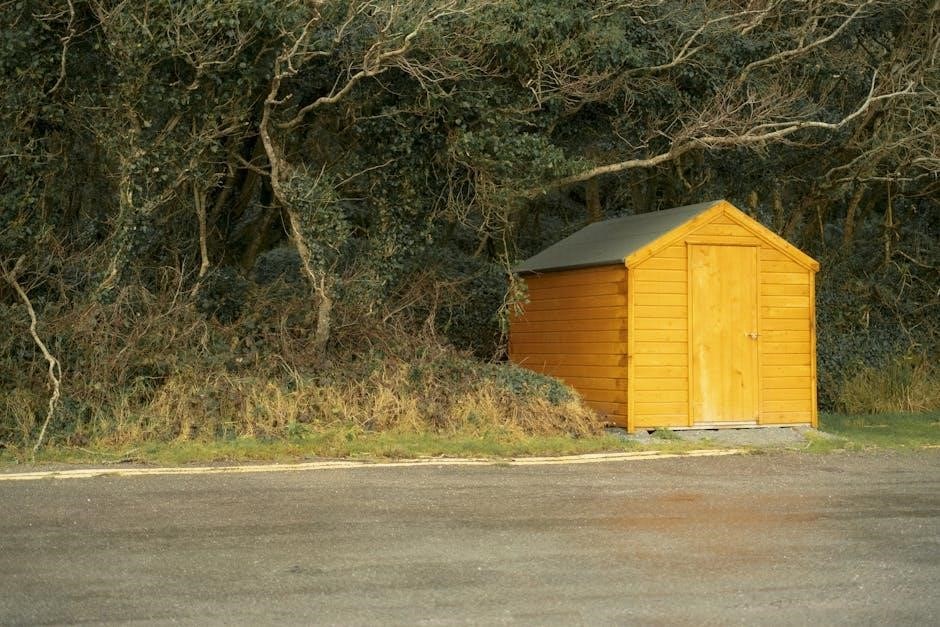
Consider a base material like gravel or a wooden platform to improve drainage and prevent ground contact. Do NOT install the shed near rooflines or structures prone to shedding snow or ice, as this can cause excessive load and potential damage. A well-prepared foundation will significantly enhance the shed’s performance and lifespan.
Ensure adequate space around the shed for access and future maintenance. The ground should be firm and capable of supporting the shed’s weight, especially when loaded with contents. Proper preparation minimizes the risk of settling or shifting over time, maintaining structural integrity.
Assembling the Base Frame
Begin by laying out the base frame components, referencing the ShelterLogic instructions for correct orientation. Securely connect the frame pieces using the provided bolts and fasteners, ensuring a tight and square assembly. Double-check all connections for stability before proceeding.
Pay close attention to the alignment of the frame, as this will impact the overall structure’s squareness. Use a measuring tape to verify that the diagonals are equal, indicating a perfectly square frame. Tighten all bolts firmly, but avoid over-tightening, which could damage the frame components.
The base frame serves as the foundation for the entire shed, so accuracy is paramount. A solid, well-assembled base will contribute significantly to the shed’s structural integrity and prevent future issues. Inventory all parts before attempting installation to ensure you have everything needed.
Constructing the Vertical Support Poles
Carefully insert the vertical support poles into the designated corners of the assembled base frame. Ensure each pole is fully seated and aligned vertically, referencing the ShelterLogic instructions for proper placement. Secure each pole to the base frame using the provided hardware – typically bolts and brackets – tightening them firmly to create a stable connection.
Pay attention to the pole ends; secure bolting is crucial during assembly. Verify that all poles are plumb, meaning perfectly vertical, using a level. Any deviation from vertical can compromise the shed’s structural integrity. Adjust as needed before fully tightening the fasteners.
These poles form the primary support structure of the shed, so a robust and accurate assembly is essential. Double-check all connections and ensure the poles are securely anchored to the base frame before moving on to the next step.
Attaching the Overhead Poles – Secure Bolting
Once the vertical support poles are firmly in place, carefully position the overhead poles to form the shed’s roof structure. Align the overhead poles with the corresponding brackets on top of the vertical poles, ensuring a snug and secure fit. Utilize the provided bolts, washers, and nuts to connect these components.
Secure bolting is paramount for the shed’s stability and ability to withstand environmental factors. Tighten all bolts progressively, alternating between opposite sides to distribute pressure evenly. Avoid over-tightening, which could damage the poles or brackets. Refer to the ShelterLogic manual for specific torque recommendations.
Beware of pole ends during this stage. Regularly check alignment and stability as you tighten the bolts. A properly assembled overhead structure is critical for supporting the shed cover and preventing collapse, especially under snow or ice loads.
Cover Installation
Begin by preparing the shed cover, then carefully drape it over the assembled frame, securing it tightly and adjusting for a proper, weather-resistant fit.
Preparing the Shed Cover
Before draping the cover, thoroughly inspect it for any damages incurred during shipping or storage. Lay the cover out flat on a clean, spacious surface – a tarp can protect it from debris. Familiarize yourself with the cover’s orientation; typically, there’s a designated front and back, often indicated by the door opening or reinforced sections.
Locate all the attachment points – these are usually reinforced loops or grommets around the perimeter of the cover. Ensure these points are free from obstructions and ready to receive the securing straps or fasteners. Some covers may have specific instructions regarding which side faces up, often related to UV protection coatings.
Consider the weather conditions. If it’s windy, enlist help to prevent the cover from blowing away during the draping process. A calm day is ideal for this step. Having a ladder or step stool readily available will aid in reaching higher sections of the frame during installation, ensuring a secure and even fit.
Draping and Securing the Cover
Begin draping the cover over the assembled frame, starting at one end and working your way across. Ensure the cover is evenly distributed, avoiding excessive bunching or stretching. Align the door opening with the designated door frame area. Two people are highly recommended for this step, especially with larger covers.
Once positioned, begin securing the cover using the provided straps, bungee cords, or fasteners. Start with the corners, ensuring they are firmly attached to the frame. Then, work your way around the perimeter, spacing the fasteners evenly to maintain consistent tension. Avoid over-tightening, which could damage the cover or frame.
Pay close attention to areas prone to wind uplift, such as the sides and top. Additional fasteners may be needed in these locations. Regularly check the tension as you secure the cover, making adjustments as needed to ensure a snug and weatherproof fit. A properly secured cover is crucial for the shed’s longevity.
Tightening and Adjusting the Cover
After initial securing, thoroughly inspect the cover for wrinkles, sags, or uneven tension. Begin tightening straps and fasteners incrementally, working in a circular pattern around the shed. This prevents localized stress and ensures uniform distribution of the cover’s weight.
Check for proper alignment with the frame, particularly around the door opening and corners. Adjust the cover’s position as needed, re-securing fasteners to maintain a taut and weatherproof seal. Pay attention to areas where water could potentially pool, ensuring they are adequately supported.
Regularly re-tighten fasteners, especially after periods of strong wind or heavy precipitation. Monitor the cover for signs of wear or damage, addressing any issues promptly to prevent further deterioration. Consistent maintenance extends the cover’s lifespan and protects your stored items. A snug fit is vital for stability.

Door and Access Point Installation
Install the door frame securely, then attach the cover, ensuring proper zipper and fastener alignment for easy access and a weatherproof closure.
Installing the Door Frame
Begin by carefully laying out all door frame components, referencing the ShelterLogic manual for correct part identification. The frame typically consists of vertical and horizontal pieces that connect to form the door opening. Ensure the ground is level where the door frame will sit, as this is crucial for smooth door operation.
Connect the frame pieces using the provided hardware – often bolts and nuts – tightening them securely. Pay close attention to the orientation of the frame; the door should swing freely in the desired direction. Some models may require pre-drilling holes for easier assembly. Once the frame is assembled, position it within the shed opening, ensuring it’s square and aligned with the surrounding structure.
Secure the door frame to the shed’s vertical supports using appropriate fasteners. Double-check all connections for tightness and stability. A properly installed door frame is essential for the functionality and security of your ShelterLogic shed.
Attaching the Door Cover
With the door frame securely in place, carefully unroll the door cover, ensuring it’s oriented correctly for the desired opening direction. The cover typically features reinforced edges and attachment points designed to align with the frame. Begin by loosely draping the cover over the frame, allowing for adjustments.
Align the cover’s edges with the frame, and start securing it using the provided fasteners – often straps, buckles, or Velcro closures. Work your way around the frame, gradually tightening the fasteners to ensure a snug and even fit. Avoid over-tightening, which could damage the cover or frame. Pay attention to any specific instructions in the ShelterLogic manual regarding cover attachment;
Ensure the cover is taut and wrinkle-free for optimal weather protection. Properly attached, the door cover will provide a secure and weatherproof entry point to your shed.
Securing Door Zippers and Fasteners
Once the door cover is attached, focus on the zippers and any additional fasteners. These are crucial for a secure closure and protection against the elements. Carefully inspect the zipper teeth for any obstructions before attempting to close the door. A smooth zipper operation is essential for easy access.
Test the zipper’s full length, ensuring it engages properly at both ends. If the zipper is stiff, a silicone-based lubricant can help. For doors with additional buckles or straps, tighten them evenly to create a tight seal. These fasteners reinforce the zipper and provide extra security against wind and rain.
Regularly check these fasteners for wear and tear, and replace them as needed. A well-maintained door closure system is vital for the longevity and security of your ShelterLogic shed.

Additional Considerations
Review snow load warnings, locate replacement parts easily, access ShelterLogic manuals online, and consider UTV installations, plus explore convenient cover replacement options.
Snow and Ice Load Warnings
Crucially, ShelterLogic sheds are not designed to withstand excessive snow or ice accumulation. Installation near rooflines or structures prone to shedding snow and ice is strictly prohibited. This is a vital safety precaution to prevent potential collapse and damage to the shed, as well as possible injury.
Regularly monitor snow buildup on the shed cover, especially after heavy snowfall. Proactive removal of snow – using a soft brush or broom to avoid cover damage – is highly recommended. Avoid using sharp tools or heavy objects that could puncture or tear the fabric.
The shed’s frame is engineered for general weather protection, but it lacks the structural reinforcement needed to bear significant weight from snow and ice. Ignoring these warnings can void the warranty and compromise the shed’s integrity. Always prioritize safety and preventative maintenance during winter months.
Finding Replacement Parts
Genuine ShelterLogic replacement parts are essential for maintaining the integrity and longevity of your 10×10 shed. Utilizing non-approved components can compromise the structure and potentially void your warranty. Locating the correct parts is straightforward through several channels.
First, consult the ShelterLogic website; they offer a comprehensive parts catalog with diagrams to aid identification. Alternatively, contact their customer support team directly – they can assist with part numbers and availability based on your shed model.
Many online retailers also stock ShelterLogic replacement parts, including covers, poles, and hardware. When ordering, carefully verify the part number against your shed’s manual or the original component. Keep your purchase records for warranty claims. Prioritize authentic parts for a secure and lasting repair.
Accessing ShelterLogic Manuals and Guides
ShelterLogic provides extensive resources to support your 10×10 shed assembly and maintenance. Accessing these manuals and guides is crucial for a successful installation and understanding proper care procedures. The primary source is the official ShelterLogic website, featuring a dedicated support section.
Here, you can download product manuals, detailed guides, and helpful instructions for all their outdoor products, including the Shed-in-a-Box series. These documents cover everything from initial setup to long-term upkeep.
Digital versions offer convenient access on any device, eliminating the need to store physical copies. Furthermore, many online retailers that sell ShelterLogic products also provide links to downloadable manuals. Always refer to the official documentation for the most accurate and up-to-date information regarding your specific model.
UTV Shed Installation Considerations
When installing a ShelterLogic 10×10 shed specifically for UTV storage, several considerations are paramount. Ensure the chosen location provides ample maneuvering space around the shed for easy entry and exit of the vehicle. Reinforcing the foundation is highly recommended to support the added weight of a UTV.
Pay close attention to door width and height; confirm sufficient clearance for your UTV’s dimensions. Consider adding a ramp for easier access, ensuring it’s securely fastened and can withstand the vehicle’s weight.

Proper ventilation is crucial to prevent carbon monoxide buildup if the UTV is operated inside the shed. A video demonstrates a complete install of a Shelter Logic 10×10 UTV shed, highlighting a trouble-free kit. Always consult the ShelterLogic manual for specific weight limits and safety guidelines.
Cover Replacement Options
Replacing the cover on your ShelterLogic 10×10 shed is a straightforward process, ensuring continued protection from the elements. Numerous replacement cover options are available, specifically designed for this model. When selecting a replacement, verify compatibility with the shed’s frame dimensions to guarantee a secure fit.
Consider the material – polyethylene is standard, but heavier-duty options offer increased durability and UV resistance. Look for covers with reinforced seams and UV-treated fabric for extended lifespan.

Online retailers specialize in ShelterLogic shed covers, providing a wide selection and competitive pricing. Proper installation involves carefully draping the new cover, securing it with the existing straps and fasteners, and ensuring a tight, wrinkle-free fit. Refer to the ShelterLogic manual for detailed instructions and maintenance tips to maximize cover longevity.
Leave a Reply