Sculpey Clay Instructions: A Comprehensive Guide (Updated 02/18/2026)
Discover the art of polymer clay! This guide unlocks detailed miniatures, jewelry, and décor, offering techniques for beginners and seasoned artists alike.
Welcome to the captivating world of Sculpey clay! This versatile polymer clay empowers crafters of all levels to bring their imaginative visions to life. From intricate miniature sculptures to stunning jewelry pieces and charming home décor, the possibilities are truly endless. Sculpey’s ease of use makes it an ideal medium for beginners, while its depth allows experienced artists to explore complex techniques.
This comprehensive guide will navigate you through everything you need to know, from understanding the different types of Sculpey available to mastering essential sculpting and baking methods. Prepare to embark on a rewarding creative journey!
What is Polymer Clay?
Polymer clay is a modeling material composed of PVC particles suspended in a plasticizer. Unlike traditional clay, it doesn’t require firing in a kiln; instead, it hardens when baked at relatively low temperatures in a standard oven. This makes it incredibly accessible for home crafting. It remains pliable until baked, allowing for detailed sculpting and manipulation.
The resulting hardened piece is durable and lightweight. Polymer clay is available in a vast spectrum of colors and can be easily blended to create custom shades. It’s a fantastic medium for both functional and artistic creations!
Types of Sculpey Clay
Sculpey offers a diverse range of polymer clays, each with unique properties suited for different projects. Sculpey III is a classic, softer clay, ideal for beginners. Original Sculpey is economical for larger projects. Super Sculpey is firm, favored by sculptors for detail.
Sculpey Premo boasts exceptional strength and flexibility, perfect for jewelry and thin pieces. Sculpey Soufflé is incredibly lightweight and airy, offering a unique texture. Understanding these differences is key to selecting the right clay for your creative vision!
Sculpey III
Sculpey III is a long-standing favorite, known for its softness and ease of use, making it an excellent starting point for beginners exploring polymer clay. This clay is particularly well-suited for projects where intricate detail isn’t paramount, and larger forms are desired. However, it’s crucial to remember that Sculpey III is quite brittle after baking.
Avoid using it for unsupported pieces thinner than 1/4 inch (6mm), as they are prone to cracking. It’s best utilized for projects with substantial thickness or those that are well-supported during the baking process.
Original Sculpey
Original Sculpey shares characteristics with Sculpey III, offering a soft and workable texture ideal for introductory polymer clay projects. Like its counterpart, it’s a fantastic choice for those new to the craft, allowing for easy shaping and manipulation. However, it’s essential to be aware of its limitations regarding durability post-baking.
This clay is also brittle and should not be used in unsupported areas thinner than 1/4 inch (6mm). It’s best suited for projects where strength isn’t a primary concern or where the design incorporates sufficient support.
Super Sculpey
Super Sculpey is a firm, beige-colored polymer clay favored by sculptors, particularly those creating figures and miniatures. It offers excellent detail retention, making it ideal for intricate work and capturing fine textures. Unlike softer clays, Super Sculpey requires more conditioning to achieve pliability, but this contributes to its strength after baking.
However, like Original Sculpey and Sculpey III, it’s also quite brittle and should not be used unsupported in areas thinner than 1/4 inch (6mm). It’s often used as a base for painting and detailing, offering a robust foundation for artistic expression.
Sculpey Premo
Sculpey Premo is a highly versatile polymer clay known for its smooth, pliable texture and vibrant color range. It’s a popular choice for both beginners and experienced artists due to its ease of conditioning and excellent strength after baking. Premo maintains detail well and is less prone to cracking compared to some other Sculpey varieties.
Crucially, Premo is a strong clay suitable for thinner pieces – even those less than 1/4 inch (6mm) – when unsupported. This makes it ideal for jewelry making and delicate sculpting projects where durability is essential. It’s a reliable option for a wide array of crafting applications.
Sculpey Soufflé
Sculpey Soufflé offers a unique, lightweight feel and a distinctive matte finish, setting it apart from other polymer clays. Its airy texture makes it incredibly enjoyable to work with, and it holds intricate details beautifully. This clay is particularly well-suited for creating larger pieces or projects where weight is a concern.
Like Sculpey Premo, Soufflé is a strong clay capable of supporting thinner sections without cracking, provided they aren’t less than 1/4 inch (6mm). It’s a fantastic choice for jewelry, miniatures, and decorative items, offering a soft, elegant aesthetic.
Essential Tools for Working with Sculpey Clay
Embarking on your Sculpey journey requires a few key tools! Basic necessities include needles for precise detailing, blades for clean cuts, and rollers for evenly conditioning and shaping the clay. These foundational tools empower you to manipulate the material with control and accuracy.
Beyond the basics, specialty tools elevate your creations. Texture sheets imprint beautiful patterns, while extruders create consistent shapes and strands. Investing in these tools unlocks a wider range of artistic possibilities, allowing for intricate designs and professional-looking finishes.
Basic Tools: Needles, Blades, and Rollers
Needles are indispensable for sculpting fine details, creating textures, and making precise holes. A variety of needle sizes allows for versatility in your work. Blades, crucial for slicing clay, offer clean edges and are essential for caning techniques. Choose blades with comfortable grips for extended use.
Rollers are vital for conditioning clay, removing air bubbles, and achieving consistent thickness. Acrylic rollers are popular, but pasta machines can also be adapted for this purpose. Proper conditioning ensures a smooth, workable clay body, preventing cracks during baking.
Specialty Tools: Texture Sheets & Extruders
Texture sheets elevate your Sculpey creations by imprinting intricate patterns onto the clay surface. Available in countless designs – from wood grain to geometric shapes – they add depth and visual interest. Simply roll the clay over the sheet with a roller for a professional finish.
Extruders shape clay into various profiles, creating consistent strands, coils, and unique forms. They’re perfect for making beads, hair, or decorative elements. Different dies offer a wide range of shapes, expanding your design possibilities and streamlining repetitive tasks.
Preparing Your Workspace
A dedicated, non-porous workspace is crucial for successful Sculpey clay crafting. Cover your surface with wax paper, glass, or a ceramic tile to prevent sticking and facilitate easy cleanup. Avoid fabrics or porous materials that can leave lint or absorb oils from the clay.
Good lighting is essential for detailed work. Ensure your area is well-lit to accurately see colors and shapes. Keep your tools organized and within easy reach. A clean and organized workspace promotes focus and enhances the creative process, leading to better results.
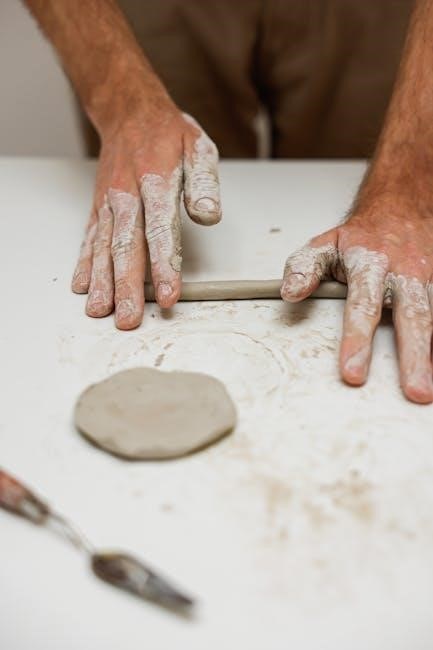
Conditioning Sculpey Clay
Proper conditioning is vital for achieving a smooth, workable consistency with Sculpey clay. New clay can be quite firm, so kneading and warming it up is essential. Use a clay conditioning machine or your hands to repeatedly fold and press the clay.
Continue conditioning until the clay becomes pliable and loses its crumbly texture. This process develops the polymers, making it stronger and less prone to cracking during baking. Insufficiently conditioned clay will be brittle and difficult to sculpt with, impacting the final result.
Basic Sculpting Techniques
Mastering fundamental techniques unlocks a world of creative possibilities with Sculpey clay. Marbling involves twisting and rolling two or more colors together, creating a beautiful swirled effect – perfect for unique designs; Caning utilizes layered patterns rolled into logs and then sliced, revealing intricate designs within.
The Skinner blend is a technique for achieving a smooth color gradient, transitioning seamlessly from one shade to another. These techniques, combined with practice, will build a strong foundation for more complex sculpting projects;
Marbling with Sculpey Clay
Achieving a marbled effect with Sculpey clay is surprisingly simple and yields stunning results. Begin by selecting two or more colors of clay. Gently twist these colors together, avoiding complete blending – the goal is to maintain distinct color variations. Next, roll the combined clay into a log shape.
Continue rolling and gently folding the clay to further swirl the colors. This process creates a beautiful, organic pattern. The degree of marbling depends on how much you blend; less blending results in bolder streaks, while more creates a softer, diffused look.
Caning Techniques
Caning is a fascinating Sculpey technique involving the creation of intricate, layered patterns within a clay log. Start by carefully layering different colored clays, building up your desired design. Once layered, gently roll and shape the clay into a cylindrical log – this is your cane.
The key is consistent pressure to avoid distorting the pattern. After forming the cane, carefully slice across it to reveal the design. These slices can then be applied to other clay surfaces, creating beautiful and detailed embellishments. Experiment with various color combinations and patterns!
Skinner Blend: Creating Color Gradients
The Skinner blend is a technique used to achieve a smooth, gradual transition between two or more colors in polymer clay. Begin by creating a flat sheet of each color you wish to blend. Carefully fold the sheet in half, pressing firmly to adhere the colors together.

Repeat this folding process multiple times, gradually creating a marbled effect. Then, gently roll and stretch the clay log to lengthen it, revealing a beautiful, seamless color gradient. This technique is perfect for creating realistic effects like sunsets or flowing fabrics!
Working with Thin Pieces & Clay Strength
Creating delicate, thin pieces with polymer clay requires careful consideration of clay strength. Sculpey III, Original Sculpey, Super Sculpey, and Bake Shop clays are more brittle after baking and are not ideal for unsupported areas thinner than 1/4 inch (6mm). These clays are prone to cracking or breaking.
For thin designs, opt for stronger clays like Sculpey Premo, Fimo, Pardo, Kato, Cernit, or Soufflé. These offer greater flexibility and durability. Proper baking is also crucial to maximize strength and prevent warping or fragility in your finished pieces.
Using Liquid Sculpey
Liquid Sculpey is a remarkably versatile addition to any polymer clay artist’s toolkit. It functions exceptionally well as a grout, or “slip,” for joining regular polymer clay pieces – essentially acting as a glue. Scoring both surfaces before applying the liquid Sculpey enhances the bond’s strength significantly.
Beyond joining, Liquid Sculpey boasts diverse applications. It can be used for creating unique textures, filling gaps, and even as a protective coating. Explore its potential for mixed media projects and discover how this innovative product can elevate your polymer clay creations!
Liquid Sculpey as Grout/Slip
Liquid Sculpey excels as a reliable grout or slip, seamlessly bonding polymer clay components. This is particularly useful when assembling complex pieces or repairing minor imperfections. For optimal adhesion, always score both surfaces intended for joining before applying the liquid clay. This creates texture, maximizing the surface area for a stronger connection.
Think of it as a polymer clay “glue” – it fills gaps and creates a durable, almost invisible join. Mastering this technique unlocks possibilities for intricate designs and robust creations, ensuring your sculpted pieces withstand handling and display.
Versatile Applications of Liquid Sculpey
Liquid Sculpey’s adaptability extends far beyond a simple adhesive. It’s a fantastic medium for creating translucent effects, mimicking glass or water in your sculptures. Use it to fill in detailed areas, achieving smooth, even surfaces that would be difficult to sculpt directly. It also works wonderfully as a sealant, protecting painted surfaces and adding a glossy finish.
Experiment with layering Liquid Sculpey to build up textures or create unique dimensional effects. Its versatility truly shines when combined with traditional Sculpey clay, opening up a world of creative possibilities for artists of all levels.
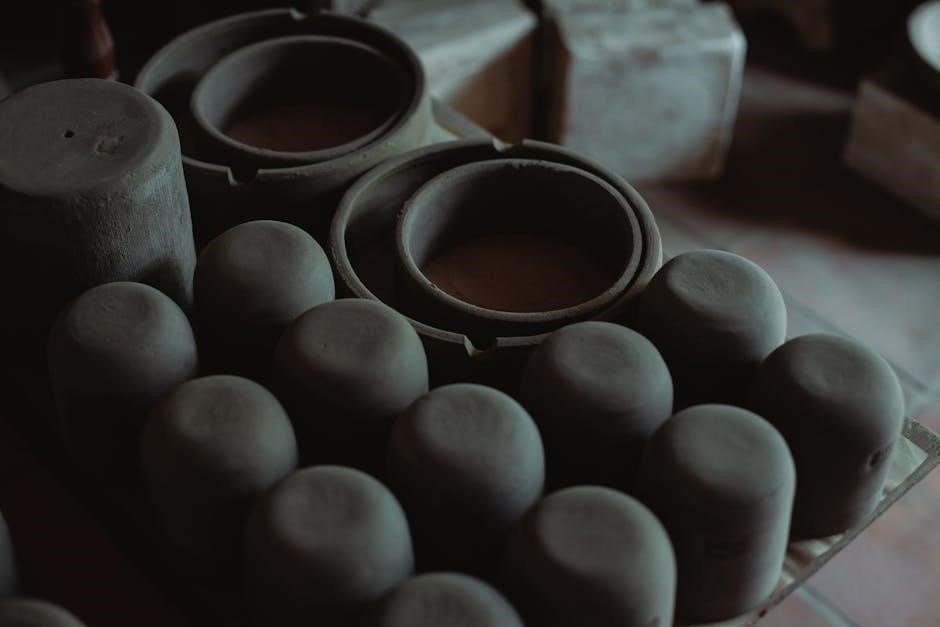
Baking Sculpey Clay: Temperature & Time
Proper baking is crucial for durable Sculpey creations. Generally, bake at 275°F (135°C) for 15 minutes per ¼ inch (6mm) of thickness. However, always refer to the specific packaging instructions for your Sculpey clay type, as times can vary. Using an oven thermometer ensures accurate temperature control, preventing under-baking or burning.
Consistent baking yields the strongest results. Avoid fluctuating temperatures and ensure even heat distribution. After baking, allow your piece to cool completely before handling or finishing, maximizing its strength and longevity.
Troubleshooting Common Issues
Encountering problems? Here’s how to fix them! Cracking during baking often indicates insufficient conditioning or rapid temperature changes. Re-condition the clay thoroughly and ensure a slow, even bake. If your clay is too soft or sticky, it may be due to humidity or improper storage. Add a bit of cornstarch or clay softener to restore its consistency.
Brittle pieces usually mean using the wrong clay for thin sections; opt for Premo, Fimo, or Soufflé for delicate designs. Remember, proper preparation prevents poor results!
Cracking During Baking
Dealing with cracks? This frustrating issue often stems from inadequate conditioning of the clay before baking. Ensure the clay is thoroughly worked until it’s soft and pliable, eliminating air bubbles. Rapid temperature fluctuations within the oven can also cause cracking; preheat correctly and avoid drafts.
Insufficient clay thickness, especially with certain Sculpey types like Original Sculpey, contributes to breakage. Support thin areas or choose stronger clays like Premo for delicate designs. A slow, even bake is crucial!
Clay is Too Soft/Sticky
Is your Sculpey stubbornly sticky? This often happens with warmer temperatures or insufficient handling. Thorough conditioning is key – kneading and working the clay will restore its firmness. If it remains too soft, briefly chill the clay in the refrigerator (not freezer!) for 10-15 minutes.
Avoid handling the clay excessively with warm hands. A little cornstarch or baby powder can absorb excess moisture, but use sparingly to prevent a dusty finish. Remember, different Sculpey types have varying softness levels!
Finishing Techniques
Elevate your Sculpey creations with professional finishing! After baking and cooling, sanding removes imperfections and creates a smooth surface. Start with coarser grit sandpaper and gradually move to finer grits for a polished feel. Buffing with a soft cloth enhances the shine, revealing vibrant colors.
For added protection and aesthetic appeal, apply a varnish. Choose a gloss finish for a brilliant sheen or a matte finish for a subtle, sophisticated look. Experiment with different varnishes to achieve your desired effect!
Sanding and Buffing
Achieve a flawlessly smooth finish with sanding and buffing! Begin by gently sanding your baked Sculpey piece with progressively finer grits of sandpaper – starting coarser to remove imperfections, then moving to finer grits for polishing. Wet sanding can minimize dust and create an even smoother surface.
Once sanded, buffing brings out the shine. Use a soft cloth or a polishing wheel with a buffing compound to create a lustrous sheen. This process refines the surface, enhancing color vibrancy and overall aesthetic appeal.
Adding Gloss or Matte Finishes
Elevate your Sculpey creations with professional-grade finishes! After sanding and buffing, applying a varnish protects the clay and enhances its appearance. Gloss varnishes create a shiny, reflective surface, ideal for jewelry and vibrant designs. Matte varnishes offer a subtle, sophisticated look, perfect for miniatures and realistic sculptures.
Apply varnish in thin, even coats using a soft brush or spray. Multiple coats provide greater durability and a richer finish. Allow each coat to dry completely before applying the next for optimal results.
Sculpey Clay for Jewelry Making
Sculpey clay is exceptionally well-suited for crafting unique, lightweight jewelry pieces! From earrings and pendants to beads and bracelets, the possibilities are endless. Utilize strong clay varieties like Sculpey Premo, Fimo, or Soufflé to ensure durability, especially for delicate designs. Incorporate findings such as jump rings, earring hooks, and clasps to complete your creations.
Caning techniques allow for intricate patterns within beads, while marbling adds a vibrant, swirling effect. Remember to bake pieces thoroughly and finish with a protective varnish for lasting shine and resilience.
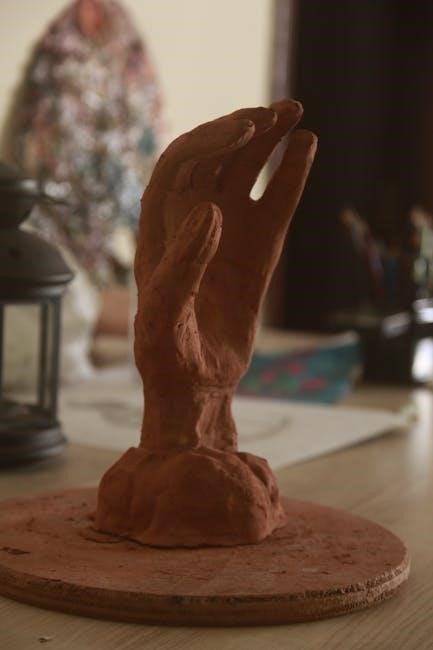
Sculpey Clay for Miniature Sculpting
Sculpey clay’s versatility truly shines when creating detailed miniature sculptures! Its ability to hold fine details makes it ideal for crafting tiny figures, food items, or intricate scenes. Employ needle tools for sculpting precise features and textures. Stronger clay types, such as Super Sculpey, Premo, or Soufflé, are recommended for unsupported elements, preventing breakage during handling and baking.
Mastering caning and Skinner blend techniques unlocks realistic color variations and patterns. Remember to support delicate parts during baking to maintain their shape and prevent warping.
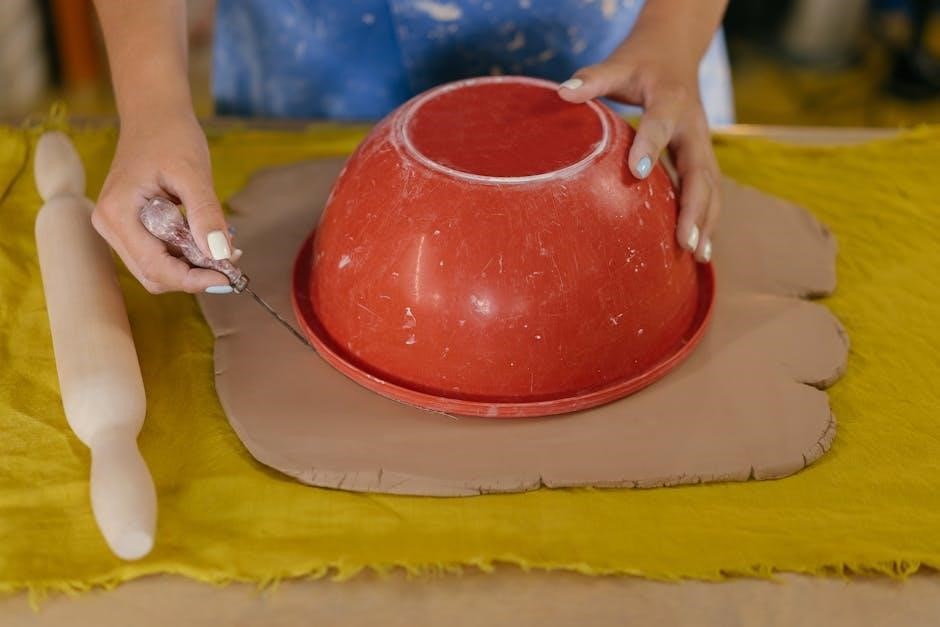
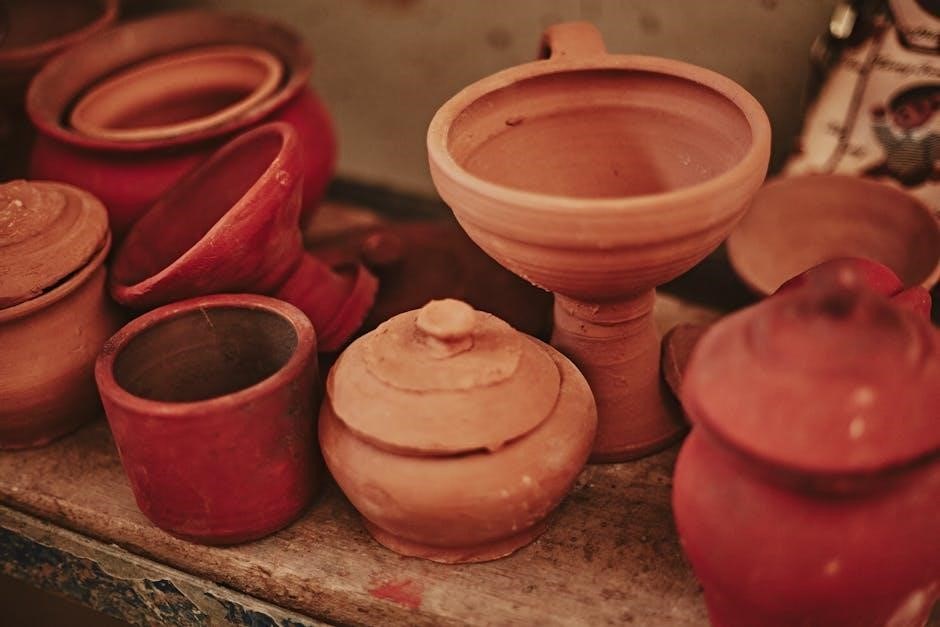
Sculpey Clay for Home Decor
Transform your living space with unique, handcrafted décor using Sculpey clay! Create charming ornaments, decorative bowls, or personalized knobs for furniture. Utilize texture sheets to add interesting patterns to larger pieces, enhancing their visual appeal. Liquid Sculpey serves as excellent “grout” or a slip to join components securely before baking, ensuring durability.
For substantial home décor items, consider reinforcing the clay with wire armatures for added strength. Remember to bake according to the clay type’s instructions for optimal results and lasting beauty.
Safety Precautions When Using Sculpey Clay
Prioritize safety while enjoying Sculpey clay! Always work in a well-ventilated area to avoid inhaling any potential fumes during baking. Never bake clay on cookware intended for food use; dedicate specific tools and surfaces solely to crafting. Avoid touching your face while working with clay to prevent accidental ingestion.
Wash your hands thoroughly after handling Sculpey, and supervise children closely during use. While generally non-toxic, it’s best to practice good hygiene. Store clay in a cool, dry place, away from direct sunlight and extreme temperatures.
Resources for Beginners
Embark on your Sculpey journey with readily available resources! The Sculpey Official Website provides tutorials and beginner-friendly products, offering step-by-step guidance for crafting success. Explore their detailed guides to understand different clay types and essential techniques.
Connect with fellow enthusiasts in vibrant Online Communities & Forums. Share your creations, ask questions, and learn from experienced artists. These platforms foster a supportive environment for growth and inspiration. Discover a wealth of knowledge and unlock your creative potential with these helpful resources!
Sculpey Official Website & Tutorials
Dive into Sculpey’s comprehensive online resources! The official website is a treasure trove of information, offering detailed step-by-step guides perfect for beginners. Explore a wide range of tutorials covering everything from basic conditioning to advanced sculpting techniques.
Discover essential tips and tricks to elevate your polymer clay creations. Learn about different clay types, baking temperatures, and troubleshooting common issues. The website provides a solid foundation for at-home crafting success, ensuring a rewarding and enjoyable experience.
Online Communities & Forums
Connect with fellow polymer clay enthusiasts! Online communities and forums provide a vibrant space to share ideas, ask questions, and learn from experienced sculptors. These platforms are invaluable for beginners seeking guidance and inspiration.
Benefit from collective knowledge and discover innovative techniques. Receive constructive feedback on your projects and participate in exciting challenges. Explore diverse styles and expand your creative horizons within a supportive and collaborative environment. Find inspiration and unlock your full potential!
Advanced Techniques & Exploration
Elevate your Sculpey skills beyond the basics! Once comfortable with fundamental techniques, delve into more complex methods like mokume gane, complex caning, and intricate sculpting. Experiment with texture stamps, specialized tools, and mixed media to create truly unique pieces.
Push creative boundaries by exploring surface treatments, faux finishes, and incorporating found objects. Master color blending and gradient techniques for realistic effects. Continuously challenge yourself and unlock new artistic possibilities with Sculpey clay!
Leave a Reply