
The Prodigy brake controller expertly manages trailer braking, ensuring safe towing experiences. This manual details setup, operation, and troubleshooting for optimal performance and control.
What is a Prodigy Brake Controller?
The Prodigy brake controller is an essential safety device for anyone towing a trailer with a vehicle. It functions as the central hub for activating and regulating the trailer’s brakes, synchronizing them with the tow vehicle’s braking system. Unlike simpler controllers, the Prodigy utilizes advanced technology – specifically, proportional braking – to deliver a smoother, more controlled stopping experience.
This means the braking force applied to the trailer is directly proportional to the deceleration of the tow vehicle. The controller receives a signal when the driver applies the vehicle brakes and then sends a corresponding signal to the trailer brakes. This prevents harsh jolts and maintains stability, especially during emergency stops. It’s designed to interpret data and send precise instructions, ensuring optimal braking performance for various trailer weights and road conditions. Proper installation and setup, as detailed in this manual, are crucial for maximizing its effectiveness.
Why Choose a Prodigy Brake Controller?
Choosing a Prodigy brake controller offers significant advantages over basic braking systems. Its proportional braking technology delivers a far smoother and safer towing experience, minimizing trailer sway and preventing abrupt stops. This enhanced control is vital for protecting your cargo, vehicle, and other drivers on the road.
The Prodigy’s sophisticated design allows for precise adjustments based on trailer weight and load, ensuring optimal braking force in all conditions. It’s known for its reliability and user-friendly interface, making setup and operation straightforward. Furthermore, features like manual override provide added control in challenging situations. Investing in a Prodigy controller isn’t just about compliance; it’s about prioritizing safety and peace of mind during every journey. It’s a system designed to interpret data and deliver responsive braking.

Installation of the Prodigy Brake Controller
Proper installation is crucial for optimal performance. This section details wiring, mounting, and electrical connections, ensuring a secure and functional brake controller setup.
Wiring Diagram Overview
Understanding the wiring diagram is paramount for a successful installation. The Prodigy brake controller typically requires connections for power (12V+), ground, brake light input, and trailer brake output. A dedicated 4-way or 6-way connector is usually utilized for trailer connection, transmitting the braking signal.
The brake light input wire senses when the vehicle’s brakes are applied, activating the controller. Ensure a secure connection to the vehicle’s brake light circuit. The power wire should be connected to a fused source, protecting the controller from electrical surges. Grounding is essential for proper operation; connect to a clean, unpainted metal surface on the vehicle’s chassis.
Carefully follow the color-coding in the diagram, matching the controller’s wires to the corresponding vehicle and trailer wires. Incorrect wiring can lead to malfunction or damage. Double-check all connections before powering on the system. A properly wired controller ensures synchronized and effective trailer braking.
Mounting the Controller
Secure mounting is crucial for reliable operation and preventing damage. Choose a location within easy reach of the driver, typically under the dashboard. Ensure the location doesn’t interfere with legroom or vehicle controls. Avoid areas exposed to excessive heat or moisture.
Use the provided mounting bracket and screws to attach the controller firmly to the vehicle’s dashboard. Pre-drilling pilot holes can simplify installation and prevent cracking. Ensure the controller is angled for optimal visibility of the display panel.
Properly route the wiring harness, avoiding sharp bends or contact with moving parts. Secure the harness with zip ties or clips to prevent it from dangling or becoming entangled. A stable and accessible mounting position enhances usability and long-term durability of the brake controller.
Connecting to the Vehicle’s Electrical System
Prior to connection, disconnect the vehicle’s battery to prevent short circuits. Identify the vehicle’s brake light wire – typically a dark green or brown wire – using a wiring diagram specific to your vehicle. Connect the controller’s white wire to this brake light wire.
Connect the controller’s black wire to a suitable ground point on the vehicle’s chassis, ensuring a clean and secure connection. The controller’s red wire requires connection to a 12-volt fused power source, activated by the ignition switch.
Double-check all connections for tightness and proper insulation. Reconnect the vehicle’s battery and verify the controller powers on. A correctly wired system is essential for safe and effective trailer braking functionality.

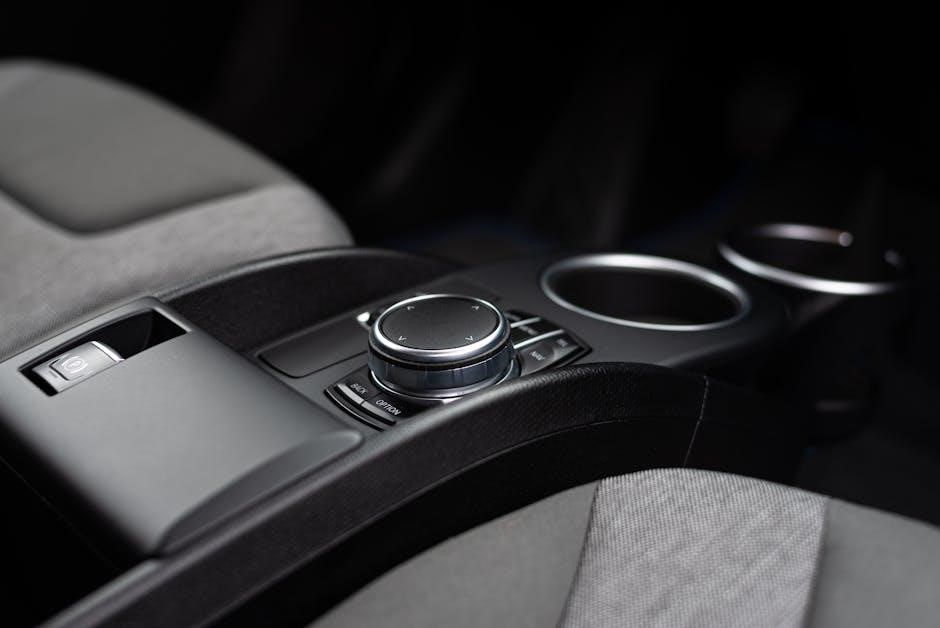
Understanding the Controller Interface
The interface features a display panel, control knob, and indicator lights, providing intuitive control over braking functions and displaying vital system information.
Display Panel Explanation
The Prodigy brake controller’s display panel provides crucial information at a glance, enhancing user awareness and control. The primary element is the digital readout, which indicates the applied braking power level, ranging from 0.0 to 100.0 percent. This allows for precise adjustments based on trailer weight and road conditions.
Adjacent to the braking power display, you’ll find indicator icons. A “Power” icon confirms the controller is receiving electrical current from the tow vehicle. A “Ground” icon verifies a solid connection to the vehicle’s chassis. The “Trailer Disconnected” icon illuminates when no trailer wiring is detected, preventing accidental activation.
Furthermore, the panel features error code displays. Should the controller detect a fault, a specific alphanumeric code will appear, referencing the troubleshooting section of this manual for resolution. Understanding these indicators is vital for safe and effective trailer braking.
Control Knob Functions
The Prodigy brake controller utilizes a single, multi-functional control knob for intuitive operation. Rotating the knob clockwise increases braking power, while turning it counterclockwise decreases it. The digital display simultaneously reflects these adjustments, providing real-time feedback. A quick press of the knob activates the manual override function, allowing independent trailer brake application, useful for testing or emergency situations.
Holding the knob down for a specified duration initiates the self-test sequence, verifying proper controller and trailer wiring functionality. The knob also serves as a menu navigation tool when accessing advanced settings, such as sensitivity adjustments and proportional braking configuration.
The responsiveness of the knob is adjustable within the settings, catering to user preference. Familiarizing yourself with these functions is key to maximizing the controller’s capabilities and ensuring safe towing.
Indicator Lights and Their Meanings
The Prodigy brake controller employs a series of indicator lights to communicate system status and potential issues. A solid green light signifies normal operation, indicating a secure connection to both the vehicle and trailer. A flashing green light confirms the controller is receiving a brake signal from the tow vehicle during application.
A red light signals a critical error, potentially indicating a short circuit, open ground, or disconnected trailer wiring. Consult the troubleshooting section of this manual for specific error code interpretations. An amber light suggests a low voltage condition, which may affect braking performance.
Understanding these visual cues is crucial for proactive monitoring and swift resolution of any problems encountered during operation, ensuring a safe and reliable towing experience. Regularly check the lights before and during travel.

Setting Up and Adjusting the Prodigy Controller
Proper setup is vital for optimal braking. Begin with a self-test, then carefully adjust sensitivity and maximum brake force settings to match your trailer’s weight.
Initial Power-Up and Self-Test
Upon initial power-up, the Prodigy controller performs a self-test sequence to verify proper functionality of the internal circuitry and the connection to the vehicle and trailer. Observe the display panel; all indicator lights should illuminate briefly, then cycle through a diagnostic pattern. This confirms the controller is receiving power and communicating with the towing vehicle’s electrical system.
If any lights remain illuminated or flash erratically during the self-test, consult the troubleshooting section of this manual. A failed self-test indicates a potential issue with the wiring, power supply, or the controller itself. Ensure the vehicle’s ignition is turned on, but the engine does not need to be running during this process. Following a successful self-test, the controller is ready for sensitivity adjustments and trailer brake force settings.
Remember to disconnect any previously connected trailer wiring before initiating the self-test to avoid interference or inaccurate readings. A clean self-test is the first step towards safe and reliable trailer braking.
Adjusting Sensitivity Settings
Sensitivity settings on the Prodigy controller dictate how quickly and aggressively the trailer brakes engage in response to the vehicle’s braking. Lower sensitivity settings are ideal for empty trailers or slippery road conditions, providing a smoother, more controlled braking experience. Higher settings are recommended for heavily loaded trailers or situations demanding maximum stopping power.
To adjust sensitivity, use the control knob to navigate to the sensitivity menu on the display panel. Incrementally increase or decrease the sensitivity level, observing the controller’s response during a test drive in a safe, open area. Start with a lower setting and gradually increase it until the trailer brakes synchronize effectively with the tow vehicle.
Proper sensitivity adjustment prevents trailer sway and ensures optimal braking performance. Avoid excessively high settings, which can cause jerky braking or even trailer skidding. Fine-tuning the sensitivity is crucial for a safe and comfortable towing experience.
Setting Maximum Brake Force
Maximum brake force determines the highest level of braking power the controller will apply to the trailer. Correctly setting this ensures the trailer brakes don’t lock up, causing loss of control, yet provides sufficient stopping power for safe towing. This setting is crucial, especially with varying trailer loads and road conditions.
To set maximum force, access the corresponding menu via the controller’s display panel and control knob. Gradually increase the force level during a controlled test drive. Monitor the trailer’s braking response, looking for signs of wheel lockup or skidding. Reduce the force if these occur.
Optimal force setting allows for firm, controlled braking without compromising stability. Consider the trailer’s weight and the type of cargo when making adjustments. Regularly re-evaluate this setting with changes in load to maintain safe and effective braking performance.
Troubleshooting Common Issues
Addressing problems like power failures, unresponsive brakes, or error codes is vital for maintaining trailer safety. This section provides solutions for quick diagnosis and repair.
Controller Not Powering On
If your Prodigy brake controller fails to power on, begin with the simplest checks. First, verify the connection at the vehicle’s wiring harness; ensure it’s securely fastened. Next, inspect the inline fuse located on the controller’s power wire – a blown fuse is a common culprit. Replace it with a fuse of the exact same amperage rating.
Confirm that the vehicle’s ignition is switched on, as the controller requires vehicle power to operate. Check the controller’s ground connection; a loose or corroded ground can prevent power-up. Examine the wiring for any signs of damage, such as cuts or frayed insulation. If these steps don’t resolve the issue, consult a qualified automotive electrician to diagnose potential problems within the vehicle’s electrical system or the controller itself. Remember safety first!
Brakes Not Responding
If the trailer brakes aren’t responding despite the controller displaying activity, several factors could be at play. Initially, confirm the emergency breakaway cable is disconnected; an engaged breakaway cable overrides the controller. Next, inspect the trailer’s brake wiring and connections – look for corrosion, loose wires, or damaged connectors. Verify the trailer’s brake magnets or electric brakes themselves are functioning correctly; a test with a separate power source can confirm this.
Ensure the controller’s output voltage is appropriate for your trailer’s brake system. Check the sensitivity and maximum brake force settings on the controller; improper settings can hinder brake performance. If issues persist, examine the vehicle’s wiring harness connection to the controller, and consider a professional inspection of the entire brake system.
Error Codes and Their Solutions
The Prodigy controller utilizes error codes to diagnose potential issues. A flashing display indicates a problem requiring attention. Code ‘1’ typically signifies a short circuit in the trailer wiring, demanding a thorough inspection of all connections. Code ‘2’ suggests an open circuit, meaning a break in the wiring – trace the wires meticulously. Code ‘3’ often points to a ground fault, requiring verification of the controller’s and vehicle’s grounding points.
If a code ‘4’ appears, it indicates a communication error between the controller and the vehicle’s system; check the connector. For any persistent error, consult the complete instruction manual for detailed troubleshooting steps. Disconnecting and reconnecting the controller can sometimes reset the system and clear minor errors. If problems continue, professional assistance is recommended;

Advanced Features and Settings
Explore proportional braking, manual override, and weight adjustments for customized control. These settings optimize performance, adapting to varying trailer loads and driving conditions effectively.
Proportional Braking Explained
Proportional braking is a key feature of the Prodigy controller, offering a smoother, more natural braking experience. Unlike traditional time-delayed controllers, proportional braking applies trailer brakes in direct relation to the vehicle’s braking intensity. As you brake harder, the trailer brakes engage more firmly, and vice versa.
This system utilizes an internal accelerometer to detect the vehicle’s deceleration rate. The controller then translates this information into a corresponding braking signal sent to the trailer. This results in significantly reduced trailer sway and improved stopping distances, particularly in emergency situations. It mimics the feel of braking with an empty trailer, even when fully loaded.
To fully benefit from proportional braking, proper adjustment of the sensitivity settings is crucial. Experiment with different levels to find the optimal setting for your vehicle and trailer combination, ensuring a balanced and controlled braking performance.
Manual Override Function
The manual override function provides a crucial safety feature, allowing the driver to independently apply the trailer brakes regardless of the vehicle’s braking system. This is particularly useful in situations where the trailer becomes unstable or requires additional braking force, such as descending steep grades or navigating challenging terrain.
Activating the manual override typically involves pressing and holding a dedicated button or switch on the controller. While engaged, the trailer brakes will apply at the intensity set by the control knob, overriding the proportional braking system. Releasing the button immediately disengages the override, returning control to the proportional braking function.
Familiarize yourself with the location and operation of the manual override before towing. Practice using it in a safe, controlled environment to understand its responsiveness and ensure you can react quickly in an emergency. Always use with caution and awareness of road conditions.
Adjusting for Different Trailer Weights
Proper adjustment for varying trailer weights is paramount for safe and effective braking. The Prodigy controller utilizes proportional braking, meaning it applies the trailer brakes in proportion to the vehicle’s braking. However, the controller needs to be calibrated to the specific weight of the trailer being towed.
Begin by ensuring the controller is set to the correct trailer weight range. Many models feature adjustable settings to accommodate different weight capacities. Start with a lower sensitivity setting and gradually increase it during test runs until optimal braking performance is achieved. Observe the trailer’s response to braking – it should remain stable and controlled without excessive braking force.
Heavier trailers generally require higher sensitivity settings, while lighter trailers need lower settings. Always consult the trailer manufacturer’s recommendations and prioritize safety when making adjustments.

Maintenance and Care
Regular inspection of wiring and cleaning the controller are vital for longevity. Proper storage, away from moisture, ensures consistent performance and reliable operation.
Cleaning the Controller
Maintaining a clean controller is crucial for optimal functionality and a prolonged lifespan. Dust, dirt, and debris can accumulate over time, potentially interfering with internal components and display visibility. To clean the Prodigy brake controller, always disconnect it from the vehicle’s power source first – safety is paramount!
Use a soft, dry cloth to gently wipe down the exterior casing. Avoid abrasive cleaners or solvents, as these can damage the plastic and electronic parts. For stubborn grime, lightly dampen the cloth with water, ensuring it’s not dripping wet. Pay particular attention to the display panel and control knob, carefully removing any dust or fingerprints.
Do not attempt to disassemble the controller for cleaning purposes. This could void the warranty and potentially cause irreparable damage. If the controller has been exposed to moisture or extreme temperatures, allow it to dry completely before reconnecting it to the vehicle. Regular, gentle cleaning will help keep your Prodigy brake controller in excellent working condition for years to come.
Inspecting Wiring Connections
Regularly inspecting wiring connections is vital for ensuring a reliable and safe braking system. Loose or corroded connections can lead to intermittent operation or complete failure of the trailer brakes. Before inspecting, disconnect the vehicle’s ignition and the brake controller from its power source.
Carefully examine all wiring connections at the controller itself, the vehicle’s wiring harness, and the trailer connector. Look for signs of corrosion, such as green or white buildup, and ensure all connections are tight and secure. Gently tug on each wire to verify it’s firmly seated in its connector. If corrosion is present, clean the terminals with a wire brush or electrical contact cleaner.
Replace any damaged or frayed wires immediately. Use appropriate connectors and ensure proper crimping or soldering techniques. After inspecting and tightening all connections, reconnect the power and test the controller’s functionality to confirm proper operation. Consistent inspection prevents potential hazards.
Long-Term Storage Guidelines
Proper long-term storage preserves your Prodigy brake controller’s functionality and extends its lifespan. If storing the controller for an extended period, disconnect it from the vehicle’s electrical system to prevent battery drain and potential corrosion. Clean the controller thoroughly with a soft, dry cloth to remove any dust or debris.
Store the controller in a cool, dry environment, away from direct sunlight and extreme temperatures. Avoid locations with high humidity, as moisture can damage the internal components. Consider placing the controller in a sealed plastic bag or container to further protect it from environmental factors.
Before reconnecting the controller after storage, inspect all wiring connections for corrosion or damage. A quick self-test upon reconnection verifies proper operation. Following these guidelines ensures your controller is ready for reliable service when needed.
Leave a Reply