Gree Air Conditioner User Manual: A Comprehensive Guide
Welcome! This manual provides essential guidance for optimal performance, safe operation, and long-lasting enjoyment of your new Gree air conditioning system.
Congratulations on choosing a Gree air conditioner! You’ve invested in a product designed for superior comfort, energy efficiency, and lasting reliability. Gree is a global leader in HVAC technology, committed to innovation and customer satisfaction.
This user manual is your comprehensive resource for understanding and operating your new unit. It covers everything from initial setup and daily operation to advanced features, maintenance procedures, and troubleshooting tips.
Before operating your air conditioner, please take the time to carefully read this manual in its entirety. Familiarizing yourself with the instructions will ensure optimal performance, extend the lifespan of your unit, and help you avoid potential issues. We are confident that your Gree air conditioner will provide years of comfortable and efficient cooling (or heating!).
2. Safety Precautions
Important Safety Information: Your safety and the proper functioning of your Gree air conditioner are paramount. Please adhere to the following precautions to prevent injury, fire, or damage to the unit. Improper installation or operation can void the warranty and create hazardous conditions.
This appliance is not intended for use by persons (including children) with reduced physical, sensory, or mental capabilities, or lack of experience and knowledge, unless they have been given supervision or instruction concerning use of the appliance by a person responsible for their safety.
Always disconnect the power supply before performing any maintenance or cleaning. Never operate the unit with a damaged power cord or plug. Ensure proper grounding to prevent electrical shock. Do not attempt to repair the unit yourself; contact a qualified technician for assistance.
2.1. Important Warnings
Critical Safety Alerts: Ignoring these warnings could result in serious injury or property damage. Never insert objects into the air inlet or outlet, as this can damage the internal components and pose an electrical hazard. Do not operate the air conditioner in a flammable atmosphere or near combustible materials.

Avoid direct exposure to the airflow for prolonged periods, as it can cause discomfort or health issues. Ensure the unit is stable and securely installed to prevent it from falling. Do not climb onto or place heavy objects on the air conditioner. Keep the area around the unit clear of obstructions to ensure proper ventilation.
If you smell gas, immediately shut off the gas supply and contact your gas company. Do not attempt to operate the air conditioner if it has been submerged in water.
2.2. Electrical Safety
Crucial Electrical Precautions: Always ensure the air conditioner is properly grounded to prevent electric shock. Never use an extension cord or adapter plug; plug the unit directly into a dedicated, properly rated electrical outlet. Do not operate the air conditioner with a damaged power cord or plug – replace it immediately.
Before cleaning or performing any maintenance, disconnect the power supply at the circuit breaker. Avoid touching the unit with wet hands or while standing on a wet surface. If the power cord is damaged, it must be replaced by a qualified technician to avoid hazards.
Do not share the same electrical circuit with other high-power appliances. Overloading the circuit can cause a fire or electrical malfunction. Regularly inspect the power cord for any signs of damage.
3. Package Contents & Initial Inspection
Unboxing and Verification: Upon receiving your Gree air conditioner, carefully inspect the packaging for any visible signs of damage during transit. If damage is apparent, immediately contact the retailer or shipping company. Once the packaging appears intact, open the box and verify that all listed components are present;
Typically, your package should include the indoor unit, outdoor unit, remote control (with batteries), installation bracket, connecting pipes, drain hose, user manual, and installation accessories. Compare the contents against the included packing list.
Retain all packaging materials for potential returns or warranty claims. A thorough initial inspection ensures you have everything needed for a smooth installation process and protects your investment.
3.1. What’s in the Box?
Detailed Component List: Your Gree air conditioner package is designed to include everything necessary for a standard installation. Expect to find the Indoor Unit – the air handling component for your space. The Outdoor Unit houses the compressor and condenser. A Remote Control and Batteries allow convenient operation from a distance.
Installation components include a sturdy Mounting Bracket for secure indoor unit placement, Connecting Pipes for refrigerant circulation, and a Drain Hose to manage condensation. You’ll also receive essential Installation Accessories like screws, washers, and cable ties.
Finally, this package contains a crucial User Manual (that’s this document!) and a separate Installation Guide for professional installers. Verify all items are present before proceeding.
3.2. Checking for Damage
Immediate Inspection Required: Upon receiving your Gree air conditioner, carefully inspect all components for any signs of shipping damage. Examine the Indoor and Outdoor Units for dents, scratches, or broken parts. Pay close attention to the fins on both units, as these are easily bent.
Check the connecting pipes for kinks or punctures. Ensure the remote control is intact and the mounting bracket isn’t warped. If you notice any damage to the packaging itself – tears, crushing – document it with photographs before opening.
Reporting Damage: If damage is found, immediately contact the retailer and the shipping carrier to file a claim. Do not attempt to install a damaged unit. Retain all packaging materials as evidence. Your prompt action ensures a swift resolution.
4. Installation Guide

Professional Installation Recommended: While some users may attempt self-installation, Gree strongly recommends engaging a qualified HVAC technician for optimal performance and to ensure adherence to local codes. Incorrect installation can void your warranty and lead to inefficient operation or system failure.
This section provides a general overview. Always refer to the detailed installation instructions included with your specific model. Proper installation involves securing the indoor and outdoor units, correctly connecting refrigerant lines, and ensuring adequate electrical connections.
Important Considerations: Before beginning, verify the structural integrity of the mounting location and confirm sufficient electrical capacity. Failure to do so can create hazardous conditions.
4.1. Choosing the Right Location
Indoor Unit Placement: Select a location that allows for unobstructed airflow. Avoid placing the unit near heat sources, direct sunlight, or areas with high humidity. Ensure sufficient space around the unit for maintenance and cleaning – at least 15 inches of clearance is recommended on all sides.
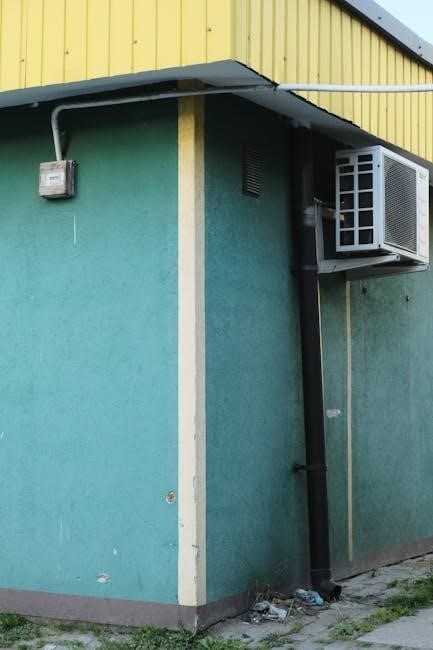
Outdoor Unit Placement: The outdoor unit should be installed on a level, stable surface, protected from extreme weather conditions. Avoid locations prone to flooding or excessive debris accumulation. Ensure adequate ventilation around the unit; maintain at least 24 inches of clearance from walls and other obstructions.
Refrigerant Line Length: Minimize the length of the refrigerant lines between the indoor and outdoor units to maximize efficiency. Consult the installation manual for maximum allowable line lengths.
4.2. Mounting the Indoor Unit
Wall Mounting: Use the provided mounting bracket to securely attach the indoor unit to a sturdy wall. Ensure the wall can support the unit’s weight, especially when full of condensate. Drill pilot holes before inserting screws for easier installation and to prevent wall damage.
Leveling: Use a level to ensure the indoor unit is perfectly horizontal. Proper leveling is crucial for efficient drainage and prevents water leakage. Adjust the bracket as needed before fully tightening the screws.
Concealing Connections: Carefully route and conceal the refrigerant lines, drain hose, and electrical wiring through the wall. Use appropriate wall sleeves or covers to maintain a neat and professional appearance. Ensure no lines are kinked or pinched.
4.3. Connecting the Outdoor Unit
Refrigerant Lines: Carefully connect the refrigerant lines between the indoor and outdoor units, ensuring a tight seal to prevent leaks. Use a wrench to tighten the flare nuts, but avoid over-tightening, which can damage the connections. Purge the lines of any air before final tightening.
Electrical Connection: Connect the power cable to the designated terminals on the outdoor unit. Important: Ensure the power is OFF at the breaker before making any electrical connections. Follow local electrical codes and regulations.
Drainage: Ensure the outdoor unit’s drain line is properly connected and directed to a suitable drainage area. Proper drainage prevents water accumulation and potential damage. Secure all connections to withstand weather conditions.
5. Understanding the Remote Control
Your Gree remote control is the central hub for managing your air conditioner’s functions. Familiarizing yourself with its layout and buttons will unlock the full potential of your cooling and heating experience. The remote utilizes infrared technology, so a clear line of sight to the indoor unit is necessary for operation.
Display Screen: The LCD screen displays the current settings, including temperature, mode, fan speed, and timer status. Ensure the batteries are fresh for optimal visibility. Replace them when the display becomes dim or unresponsive.
Key Functions: The remote features buttons for power, mode selection, temperature adjustment, fan speed control, and various advanced features like sleep and timer. We will detail each button’s function in the following section.
5.1. Remote Control Overview
Let’s take a closer look at the physical layout of your Gree remote control. At the top, you’ll find the power button, used to turn the unit on and off. Below this is the display screen, showing current settings. The temperature up and down buttons allow precise temperature adjustments.

Mode Selection: A dedicated section houses buttons for selecting operating modes – Cooling, Heating, Fan, Dry, and Auto. These are clearly labeled with corresponding icons for easy identification. Fan speed controls (Auto, Low, Medium, High) are located nearby.
Special Functions: The lower portion of the remote includes buttons for Sleep mode, Timer settings, and potentially other advanced features depending on your model. A ‘Reset’ button may be present for restoring factory defaults;
5.2. Button Functions Explained
Power Button: Initiates startup and shutdown of the air conditioner. A single press turns the unit on; another turns it off. Temperature Control: The ‘+’ and ‘-’ buttons adjust the desired room temperature in one-degree increments. The display reflects your selection.
Mode Button: Cycles through available operating modes – Cooling, Heating, Fan, Dry, and Auto. Each press selects the next mode. Fan Speed: Controls the airflow intensity. Options typically include Auto, Low, Medium, and High; Auto adjusts speed based on cooling/heating demand.
Sleep Mode: Activates a pre-programmed temperature adjustment for comfortable sleep. Timer: Sets a delayed start or stop time for the air conditioner. Reset: Returns the remote to its factory default settings.
6. Operating Modes
Your Gree air conditioner offers versatile operating modes to suit various comfort needs. Cooling Mode lowers the room temperature by actively removing heat, ideal for warm weather. Heating Mode provides warmth during colder months, utilizing a heat pump system.
Fan Mode circulates air without temperature adjustment, offering ventilation. Dry Mode (Dehumidification) reduces humidity levels, creating a more comfortable environment, especially in damp climates. Auto Mode intelligently selects the optimal cooling or heating mode based on the current room temperature, providing convenient, automated comfort.
Selecting the appropriate mode ensures efficient operation and maximizes your comfort. Refer to the remote control section for mode selection instructions.
6.1. Cooling Mode
Cooling Mode is your primary solution for lowering room temperature during warm weather. To activate, press the “Cool” button on your remote control. You can then adjust the desired temperature using the “Temp Up” and “Temp Down” buttons. The unit will begin cooling the air until the set temperature is reached.
For optimal cooling, ensure windows and doors are closed to prevent warm air from entering. The fan speed can be adjusted via the remote control – higher speeds provide faster cooling, while lower speeds are quieter. Consider utilizing the “Auto” fan speed for balanced performance.
The display will indicate “Cool” mode is active. Remember to regularly clean the air filter for efficient cooling performance.
6.2. Heating Mode
Heating Mode efficiently warms your space during colder seasons. Activate this mode by pressing the “Heat” button on your remote control. Subsequently, adjust the desired room temperature using the “Temp Up” and “Temp Down” buttons. The unit will initiate the heating process until the selected temperature is achieved.

To maximize heating effectiveness, ensure all windows and doors are securely closed to retain warmth. Adjust the fan speed using the remote; higher speeds distribute warm air faster, while lower speeds offer quieter operation. The “Auto” fan setting provides a balanced approach.
The display will clearly show “Heat” mode is engaged. Regular air filter maintenance is crucial for optimal heating performance and efficiency.
6.3. Fan Mode
Fan Mode circulates air within the room without altering its temperature. This is ideal for simply refreshing the air or complementing existing heating/cooling. To activate, press the “Fan” button on your remote control. You can then select from multiple fan speeds – Low, Medium, High, and Auto – using the corresponding buttons.
The “Auto” fan speed automatically adjusts based on room temperature, providing a comfortable and energy-efficient experience. Fan mode consumes less energy than cooling or heating modes, making it a cost-effective option for air circulation. The display will indicate “Fan” mode is active.
Regularly cleaning the air filter ensures optimal airflow and prevents dust buildup when using Fan Mode.
6.4. Dry Mode (Dehumidification)
Dry Mode, also known as dehumidification, reduces the humidity level in the room without significantly lowering the temperature. This is particularly useful in damp climates or during humid seasons, preventing mold growth and creating a more comfortable indoor environment. Activate Dry Mode by pressing the “Dry” button on your remote control.
During Dry Mode, the air conditioner operates at a lower fan speed and cycles on and off to extract moisture from the air. The display will show the “Dry” indicator. Note that some cooling may occur as a byproduct of the dehumidification process.
For optimal performance, ensure windows and doors are closed while using Dry Mode. Regularly emptying the condensate drain tank is also recommended.
6.5. Auto Mode
Auto Mode offers a convenient, hands-free operation by automatically adjusting the cooling or heating output to maintain a comfortable room temperature. When you select Auto Mode via the remote control, the air conditioner intelligently determines whether to cool or heat based on the current room temperature and your setpoint.
The unit will continuously monitor the room temperature and adjust its operation accordingly. The fan speed is also automatically controlled for optimal comfort and energy efficiency. The display will indicate “Auto” when this mode is active.
Auto Mode is ideal for situations where you prefer not to constantly adjust the settings, allowing the air conditioner to manage the temperature for you. It’s a smart choice for consistent comfort!
7. Advanced Features
Gree air conditioners are equipped with several advanced features designed to enhance your comfort and convenience. These features go beyond basic cooling and heating, offering personalized control and improved energy efficiency. Explore the capabilities of Sleep Mode, which gradually adjusts the temperature during the night for a more restful sleep experience, and the versatile Timer Function, allowing you to schedule operation to suit your daily routine.
These features are easily accessible through the remote control and provide a customized climate control experience. Utilizing these advanced options can significantly improve your overall satisfaction with your Gree air conditioner, while also potentially reducing energy consumption.
7.1. Sleep Mode
Sleep Mode on your Gree air conditioner is designed to create a comfortable sleeping environment while optimizing energy efficiency. When activated, this mode gently increases (in cooling) or decreases (in heating) the set temperature by 1-2°C per hour for the first few hours of operation.
This subtle temperature adjustment mimics the natural decrease in body temperature that occurs during sleep, promoting a more restful night. After a pre-set duration, typically 8 hours, the temperature remains constant until you manually exit Sleep Mode or the unit is turned off. To activate, simply press the “Sleep” button on your remote control. Enjoy a peaceful and energy-saving sleep with this convenient feature!
7.2. Timer Function
The Timer Function allows you to pre-set your Gree air conditioner to automatically turn on or off at a specific time. This feature offers convenience and helps manage energy consumption. You can set a timer for both immediate start/stop and a delayed start/stop.
To set a timer, use the “Timer” button on your remote control. Follow the on-screen prompts to input your desired time. You can typically set multiple timers for different days of the week. This is particularly useful for ensuring a comfortable temperature when you wake up or return home, without wasting energy while you’re away. Explore the timer settings in your unit’s menu for full customization!

8. Maintenance & Cleaning
Regular maintenance is crucial for maintaining the efficiency and longevity of your Gree air conditioner. Consistent cleaning ensures optimal performance and air quality. Neglecting maintenance can lead to reduced cooling/heating capacity, increased energy bills, and potential breakdowns.
This section details essential cleaning procedures, focusing on the air filters and cooling coils. Air filters should be cleaned every two weeks, or more frequently in dusty environments. The cooling coils require periodic cleaning to remove accumulated dirt and debris. Always disconnect the power before performing any maintenance. Following these simple steps will keep your Gree unit running smoothly for years to come!
8.1. Air Filter Cleaning
Maintaining clean air filters is the most important routine maintenance task. Dirty filters restrict airflow, reducing cooling efficiency and potentially damaging the unit. Locate the air filter(s), usually behind the front panel of the indoor unit. Gently remove the filter(s) and inspect their condition.
For washable filters, vacuum off loose dust, then rinse thoroughly with water. Allow the filter to dry completely before reinstalling. Disposable filters should be replaced with new ones of the correct size. We recommend cleaning or replacing filters every two weeks, or more often if you have pets or allergies. A clean filter ensures optimal performance and healthy air quality!
8.2. Coil Cleaning

Periodically cleaning the condenser and evaporator coils is crucial for maintaining efficiency. The outdoor condenser coil can accumulate dirt, leaves, and debris, hindering heat dissipation. Turn off power to the unit before cleaning. Use a fin comb to straighten bent fins, then gently spray the coil with a coil cleaner specifically designed for air conditioners – avoid high pressure!
The evaporator coil, located inside the indoor unit, also needs occasional cleaning. This is best left to a qualified technician, as it requires disassembly. Dirty coils reduce cooling capacity and increase energy consumption. Professional cleaning ensures optimal performance and extends the lifespan of your Gree air conditioner.
9. Troubleshooting Common Issues
If your Gree air conditioner isn’t cooling effectively, first check the air filter – a clogged filter is a frequent culprit. Ensure the thermostat is set correctly and the unit isn’t in “Fan Only” mode. If the unit freezes up, turn it off and allow it to thaw completely before restarting.
For unusual noises, inspect for loose parts or debris. If the unit is leaking water, verify the drain line isn’t blocked. If error codes appear on the display, consult the error code list in this manual. If problems persist, do not attempt self-repair; contact a qualified technician for assistance. Ignoring issues can lead to more significant damage.
10. Warranty Information
Your Gree air conditioner is covered by a limited warranty against defects in materials and workmanship for a specified period. The compressor is typically covered for a longer duration than other parts. Please retain your proof of purchase (receipt or invoice) as it is required for all warranty claims.
This warranty does not cover damage resulting from improper installation, misuse, neglect, or unauthorized repairs. For complete warranty details, including terms, conditions, and claim procedures, please visit our website at [insert website address here] or contact our customer support team at [insert phone number/email address here]. Warranty is void if modifications are made.

Leave a Reply