GE Dryer Troubleshooting Manual: A Comprehensive Guide
Navigating appliance issues can be frustrating, but this manual offers detailed solutions for common GE dryer problems, ensuring efficient operation and longevity․
Understanding Your GE Dryer
Your GE dryer, a cornerstone of modern laundry routines, utilizes a blend of heating elements, sensors, and mechanical components to efficiently remove moisture from clothes․ Familiarizing yourself with these core aspects is crucial for effective troubleshooting․ Different models – from traditional vented dryers to ventless heat pump models and combo washer/dryer units like the GE Profile UltraFast – employ varying technologies․
Understanding the dryer’s cycle settings, such as automatic dryness, timed dry, and delicate cycles, allows for optimized performance based on fabric type and load size․ Knowing the location of key components like the lint filter, drain pump filter (in combo units), and vent system is also essential for routine maintenance․ Recognizing normal operational sounds versus unusual noises can indicate potential issues before they escalate, saving time and repair costs․
Safety Precautions Before Troubleshooting
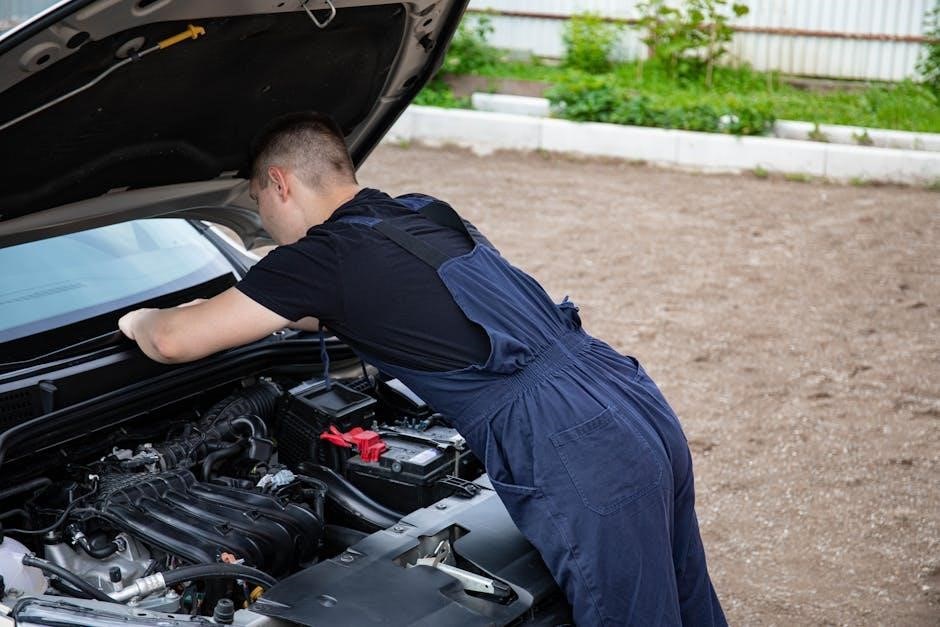
Prioritizing safety is paramount when addressing any appliance issue․ Always disconnect the dryer from its power source – unplugging it from the electrical outlet – before commencing any inspection or repair work․ Avoid attempting repairs if you lack the necessary technical expertise; improper handling can lead to electrical shock or further damage․
Never disassemble the dryer while it’s still connected to power․ Be cautious of hot surfaces, especially if the dryer was recently in use․ Wear appropriate protective gear, such as gloves, when handling internal components․ If you detect gas odors (in gas dryers), immediately shut off the gas supply and contact a qualified technician․ Remember, attempting self-repair can void warranties, so consult the owner’s manual and consider professional assistance when needed․
Common GE Dryer Problems & Solutions
Frequently encountered issues with GE dryers include heating problems, often stemming from a faulty heating element or thermal fuse․ If the dryer isn’t starting, check the power supply, door switch, and control board․ A drum that won’t tumble may indicate a worn drive belt or motor issue․ Addressing drainage concerns, particularly in combo washer/dryers, involves cleaning the drain pump filter and ensuring the hose isn’t kinked or inserted too far into the standpipe․
Error codes provide valuable diagnostic clues; resetting the dryer can sometimes resolve minor glitches․ For persistent problems, consult the owner’s manual or seek assistance from a certified GE technician․ Remember to regularly clean the lint filter and vent to maintain optimal performance and prevent fire hazards․
Drying Issues
Addressing problems like insufficient heat, prolonged drying times, or uneven results is crucial for effective laundry care and appliance efficiency․
Dryer Not Heating
If your GE dryer isn’t producing heat, several factors could be at play, demanding a systematic approach to diagnosis․ A common culprit is a blown thermal fuse, a safety device designed to cut power if the dryer overheats; checking this component is a vital first step․ The heating element itself might be faulty, requiring inspection for breaks or damage – a multimeter can confirm its continuity․
Furthermore, a malfunctioning thermostat prevents the dryer from reaching the necessary temperature․ Testing the thermostat with a multimeter will reveal if it’s functioning correctly․ Don’t overlook simpler issues like a tripped circuit breaker or a blown fuse in your home’s electrical panel․ Always prioritize safety; disconnect the dryer from power before undertaking any internal inspections or repairs․ Remember to consult your owner’s manual for specific instructions related to your model․
Clothes Taking Too Long to Dry
Prolonged drying times often signal airflow restrictions within your GE dryer system․ The most frequent cause is a clogged lint filter – cleaning it before each load is crucial for optimal performance․ However, the issue might extend beyond the filter to the dryer vent itself․ A blocked vent restricts exhaust flow, trapping moisture and lengthening drying cycles; a thorough cleaning is essential to prevent fire hazards and improve efficiency․
Additionally, an improperly sized or kinked vent hose can impede airflow․ Ensure the hose is rigid metal and free of obstructions․ Overloading the dryer also contributes to extended drying times, as it limits air circulation․ Finally, a malfunctioning thermostat or heating element could be delivering insufficient heat, necessitating further investigation and potential component replacement․
Uneven Drying
Experiencing clothes that are damp in some areas and overly dry in others points to airflow or load distribution problems within your GE dryer․ A common culprit is overloading; ensure you’re not packing the drum too tightly, allowing garments sufficient space to tumble freely․ Check the lint filter – even partial blockage restricts airflow, leading to inconsistent drying․
Beyond the filter, inspect the dryer vent for obstructions․ Restricted airflow causes temperature fluctuations, resulting in uneven drying․ Furthermore, a worn or malfunctioning drum support roller can hinder proper tumbling, creating hot spots and damp patches․ Finally, verify the moisture sensor isn’t faulty, as it may be prematurely signaling the cycle’s end before all items are fully dried․
Operational Issues
Addressing problems like a dryer failing to start, stopping mid-cycle, or a drum that won’t tumble requires systematic diagnosis and potential part replacement․
Dryer Not Starting
If your GE dryer refuses to start, begin with the simplest checks: ensure the power cord is securely plugged into a functioning outlet, and verify the circuit breaker hasn’t tripped or the fuse blown․ A simple reset – turning the dryer off and back on, or using the reset button on the plug – can often resolve minor electrical glitches․
Next, confirm the door switch is engaging correctly; the dryer won’t start if it doesn’t sense the door is fully closed․ Inspect the start button and control panel for any visible damage․ If these basic steps don’t work, the issue might lie within the thermal fuse, heating element, or the electronic control board․ These components require more advanced troubleshooting and potentially professional assistance․ Remember, never attempt repairs if you’re uncomfortable or lack the necessary expertise․
Dryer Stops Mid-Cycle
A GE dryer halting during a cycle can stem from several causes․ First, check for error codes displayed on the control panel – these provide valuable clues to the problem’s source․ Overheating is a common culprit, often linked to a clogged lint filter or a restricted dryer vent․ Ensure the lint filter is clean before each use and schedule regular vent cleaning to prevent fire hazards and maintain efficiency․
Additionally, a faulty thermal fuse or thermostat can cause the dryer to shut off prematurely as a safety measure․ A malfunctioning door switch or control board could also be responsible․ If the issue persists after addressing these potential problems, it’s advisable to consult a qualified appliance technician for a thorough diagnosis and repair, especially concerning electrical components․
Dryer Drum Not Tumbling
If your GE dryer’s drum isn’t rotating, several issues could be at play․ A broken drive belt is a frequent cause; this belt connects the motor to the drum, and its failure prevents tumbling․ Inspect the belt for wear and tear or breakage, and replace it if necessary․ Another potential problem lies with the motor itself – a faulty motor won’t provide the power needed for drum rotation․
Furthermore, check the drum rollers or glides, which support the drum’s movement․ Worn or damaged rollers can create friction, hindering the tumbling action․ Finally, a malfunctioning timer or control board could also be responsible․ If you’re uncomfortable disassembling the dryer, seeking professional assistance from a GE-certified technician is recommended for safe and effective repair․

Error Codes & Diagnostics
Decoding error messages is crucial for pinpointing dryer issues; this section details common GE dryer codes, their meanings, and potential solutions for quick fixes․
Understanding GE Dryer Error Codes
GE dryers utilize a sophisticated error code system to communicate malfunctions, simplifying the diagnostic process for both homeowners and technicians․ These codes aren’t random; they represent specific issues within the dryer’s components, ranging from heating element failures to problems with the drain pump or sensors․ Recognizing these codes is the first step towards effective troubleshooting․
Often, a simple reset – turning the dryer off and then back on, or utilizing the reset button on the power plug – can clear minor errors․ However, persistent codes indicate deeper problems requiring investigation․ Error codes are displayed on the dryer’s control panel, and referencing the owner’s manual or online resources is vital for accurate interpretation․ Ignoring these signals can lead to further damage and potentially unsafe operating conditions․ Understanding the code’s meaning allows for targeted repairs, saving time and money․
Error Code E1: Timeout During Cycle ౼ Causes & Reset
The “E1” error code on a GE dryer signals a timeout during the drying cycle, indicating the dryer didn’t reach the expected temperature within a predetermined timeframe․ Several factors can contribute to this issue․ A clogged dryer vent is a primary suspect, restricting airflow and preventing proper heating․ Additionally, a faulty heating element, a malfunctioning thermostat, or issues with the thermal fuse can all trigger this error․
To attempt a reset, first disconnect the dryer from power for several minutes․ Reconnect and restart a drying cycle․ If the E1 code persists, inspect the vent for obstructions․ If the vent is clear, further diagnostics are needed, potentially involving testing the heating element and thermostat with a multimeter․ If you’re uncomfortable with electrical testing, scheduling a professional repair is recommended to avoid safety hazards and ensure accurate diagnosis․
Decoding Other Common Error Codes (List & Meanings)
Beyond the E1 code, GE dryers utilize a range of error codes to pinpoint specific malfunctions․ An “E2” code often indicates a heating element issue, while “E3” suggests a problem with the thermal fuse or thermostat․ Codes like “E4” and “E5” can relate to motor or drive belt failures, impacting the drum’s rotation․ Less frequent codes, such as “F38” or “F39”, typically signal sensor malfunctions or control board communication errors․
Remember that a simple power cycle – disconnecting the dryer for a few minutes – can sometimes clear transient errors․ However, persistent codes necessitate further investigation․ Consulting the dryer’s service manual or the GE Appliances website provides detailed explanations for each code and recommended troubleshooting steps․ If you’re unsure about interpreting or resolving an error, contacting a qualified appliance technician is always the safest course of action․
Maintenance & Cleaning
Regular cleaning of the lint filter, vent, and drain pump is crucial for optimal performance, safety, and preventing potential dryer malfunctions․
Cleaning the Lint Filter ౼ Importance & Procedure
The lint filter is arguably the most crucial component to maintain for dryer safety and efficiency․ A clogged lint filter restricts airflow, forcing your dryer to work harder, increasing energy consumption, and potentially creating a fire hazard․ Always clean the lint filter before each load – it’s a quick task with significant benefits!
To clean, simply locate the lint filter (usually inside the dryer door or on top of the dryer)․ Remove the filter and use your fingers or a vacuum cleaner attachment to gently remove the accumulated lint․ Avoid using water or harsh chemicals, as these can damage the filter․ Ensure the filter is completely dry before reinserting it into the dryer․ A clean lint filter promotes faster drying times, reduces wear and tear on the dryer, and most importantly, minimizes the risk of a dryer fire․ Inspect the filter regularly for any tears or damage, and replace it if necessary․
Cleaning the Dryer Vent ⎼ Preventing Fires & Improving Efficiency

A clogged dryer vent poses a serious fire risk and significantly reduces dryer performance․ Lint accumulates not only in the filter but also within the vent hose and exhaust duct, restricting airflow․ Regular cleaning – ideally at least once a year, or more frequently with heavy use – is essential for safety and efficiency․
To clean, disconnect the dryer from power․ Detach the vent hose from both the dryer and the wall․ Use a dryer vent cleaning kit (available at most hardware stores) or a vacuum cleaner with a long hose attachment to remove lint buildup․ Inspect the entire length of the vent, including the exterior exhaust hood, ensuring it’s free of obstructions․ Reconnect the vent hose securely, and test the dryer to confirm proper airflow․ A clean vent reduces drying time, lowers energy bills, and prevents potentially dangerous overheating․
Cleaning the Drain Pump Filter ౼ Addressing Drainage Issues
If your GE dryer isn’t draining properly, a clogged drain pump filter is often the culprit․ This filter traps lint, debris, and small objects that can obstruct water flow, leading to standing water inside the dryer drum or error codes related to drainage․ Locating and cleaning this filter is a straightforward process․
Consult your owner’s manual for the specific location of the drain pump filter, as it varies by model․ Typically, it’s found at the bottom front of the dryer, behind a small access panel․ Before opening the panel, have towels ready to absorb any residual water․ Carefully remove the filter and clean it thoroughly, removing all lint and debris․ Reinstall the filter securely, ensuring it’s properly seated․ A clean filter restores proper drainage, preventing water damage and ensuring optimal dryer performance․
Advanced Troubleshooting
For persistent issues, inspecting the thermal fuse, heating element, and thermostat is crucial for diagnosing complex problems within your GE dryer system․
Checking the Thermal Fuse
The thermal fuse is a vital safety component designed to prevent overheating by interrupting the electrical circuit if excessive temperatures are detected within the dryer․ If your dryer isn’t heating, a blown thermal fuse is a common culprit․ Before testing, always disconnect the dryer from power! Locate the thermal fuse – typically found near the exhaust vent or on the blower housing – and access it by removing access panels․
Using a multimeter set to the continuity setting, test the fuse․ A functioning fuse will show continuity (a reading close to zero ohms), while a blown fuse will show no continuity (infinite resistance)․ If the fuse is blown, replace it with a new fuse of the exact same amperage and voltage rating․ Important: A blown fuse indicates an underlying problem causing overheating, such as a blocked vent or faulty thermostat; simply replacing the fuse without addressing the root cause will likely result in it blowing again․ Ensure proper ventilation and inspect other components before restoring power․
Inspecting the Heating Element
A malfunctioning heating element is a frequent cause of a dryer not heating․ Always disconnect power before inspecting! Access the heating element, usually located inside the dryer cabinet, requiring removal of panels․ Visually inspect the element for breaks or damage – look for any signs of burning or scorching along the coils․ If visible damage is present, the element needs replacement․
If the element appears intact, use a multimeter set to the ohms setting to test for continuity․ A good heating element will display a resistance reading (typically between 10-30 ohms, but check your dryer’s specifications)․ An open circuit (infinite resistance) indicates a failed element․ Replace the faulty element with a new one of the correct type․ Remember to carefully note the wiring configuration before removal to ensure proper reinstallation․ Addressing ventilation issues alongside element replacement is crucial for preventing future failures․
Testing the Thermostat
The thermostat regulates the dryer’s temperature, preventing overheating․ Before testing, disconnect the dryer from power! Locate the thermostat – typically near the heating element or blower housing․ Use a multimeter set to the continuity setting to test the thermostat․ With the dryer off and cool, the thermostat should show continuity (a closed circuit)․
If there’s no continuity, the thermostat is faulty and needs replacement․ Some thermostats have a high-limit reset button; attempt to reset it before assuming failure․ If it continues to trip, replacement is necessary․ When testing, ensure the dryer is completely cool to avoid inaccurate readings․ A faulty thermostat can cause no heat or overheating, impacting drying performance․ Replacing a thermostat is relatively straightforward, but always double-check wiring diagrams for correct installation․

Seeking Professional Help
For complex issues or if DIY attempts fail, contacting a certified GE technician is recommended for safe and effective repairs, utilizing genuine parts․
When to Call a GE Appliance Technician
Determining when to seek professional assistance is crucial for both safety and effective repair․ If you’ve attempted basic troubleshooting steps – like cleaning the lint filter and vent, checking the power supply, and resetting the dryer – without success, it’s time to call an expert․
Specifically, any issues involving the internal components, such as the heating element, thermal fuse, or thermostat, should be handled by a qualified technician․ These repairs often require specialized tools and knowledge to avoid further damage or potential hazards․ Furthermore, if you encounter persistent error codes that you cannot decipher or clear, professional diagnostics are essential․
Don’t hesitate to contact a GE technician if you suspect a gas leak, experience electrical issues, or are uncomfortable disassembling any part of the dryer․ Prioritizing safety and proper repair ensures your dryer operates efficiently and reliably for years to come․
Finding Authorized GE Repair Services
Locating a certified GE appliance technician is straightforward, ensuring quality service and genuine GE parts․ The official GE Appliances website provides a convenient “Find a Service Provider” tool, allowing you to search by zip code for authorized repair centers in your area․ This resource guarantees technicians are factory-trained and equipped to handle all GE dryer models․
Alternatively, you can contact GE Appliances directly via their customer service hotline to request assistance in finding a local authorized service provider․ Be prepared to provide your dryer’s model number and a detailed description of the issue․
When selecting a service provider, verify their credentials and read online reviews to assess their reputation and customer satisfaction․ Choosing an authorized GE technician offers peace of mind, knowing the repair will be performed to GE’s standards․
Preparing for a Technician Visit
To maximize the efficiency of the technician’s visit and potentially reduce costs, several preparatory steps are recommended․ First, clearly document the dryer’s issue – when it started, what happens, and any error codes displayed․ Having this information readily available will aid in diagnosis․
Ensure the dryer is accessible; clear any obstructions around the appliance․ Locate and have readily available your dryer’s model and serial number, typically found on a label inside the dryer door or on the back panel․
If you’ve already attempted any troubleshooting steps, inform the technician․ Finally, if possible, remove any laundry from the dryer to provide unobstructed access to the internal components․ A little preparation goes a long way towards a smooth and effective repair experience․
Leave a Reply