Little Giant Incubator Manual: A Comprehensive Guide
VSP members benefit from accessible vision care, including finding doctors and managing accounts online; Blue Cross Blue Shield of Michigan supports these benefits.
Regular eye exams are crucial for overall health, detecting over 270 conditions, and VSP offers customized, affordable vision plans for all life stages.
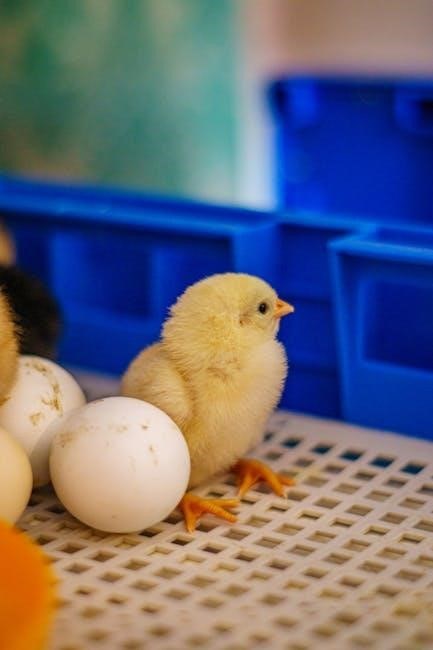
Little Giant incubators have long been a trusted name for poultry enthusiasts, hobby farmers, and educators seeking a reliable method for hatching eggs. These incubators provide a controlled environment mimicking natural brooding conditions, essential for successful development. Understanding your Little Giant model is the first step towards a rewarding hatching experience.

VSP’s emphasis on accessible vision care mirrors the accessibility Little Giant provides to hatching. Just as VSP members can easily find in-network doctors, Little Giant offers straightforward operation. Regular check-ups, like monitoring incubator temperature, are vital. Blue Cross Blue Shield’s support for VSP parallels the support available through Little Giant resources.
This manual aims to provide a comprehensive guide, covering everything from initial setup and egg preparation to troubleshooting common issues. Whether you’re a seasoned breeder or a first-time hatcher, this resource will empower you to maximize hatch rates and raise healthy chicks, ducklings, or other poultry. Remember, like VSP’s customizable plans, Little Giant offers various models to suit different needs.
Understanding Incubator Types: Still Air vs. Forced Air
Little Giant incubators come in two primary types: still air and forced air. Still air incubators, often more economical, rely on natural convection for temperature distribution. This means warmer air rises, and cooler air descends, creating temperature gradients within the incubator. Precise placement of the thermometer is crucial in still air models, as readings can vary depending on location.

Forced air incubators, like the benefits offered through VSP, utilize a fan to circulate air, ensuring more consistent temperature and humidity throughout. This even distribution minimizes temperature fluctuations, potentially leading to higher hatch rates. The consistent care provided by Blue Cross Blue Shield through VSP mirrors the consistent environment of a forced-air incubator.
Choosing between the two depends on your experience and budget. Still air incubators require more diligent monitoring and adjustment, while forced air models offer greater automation and stability. Understanding these differences, much like understanding your VSP coverage, is key to successful incubation. Both types, when properly managed, can yield excellent results, providing a rewarding experience for poultry keepers.
Key Components of a Little Giant Incubator
A Little Giant incubator, much like accessing benefits through VSP, comprises several key components working in harmony. The incubator body provides insulation, maintaining a stable internal environment. A heating element, controlled by a thermostat, generates the necessary warmth for embryonic development. Accurate temperature regulation, similar to managing your VSP vision plan, is paramount.
Humidity control is achieved through water trays, which evaporate moisture into the air. Ventilation holes regulate airflow, ensuring adequate oxygen supply and preventing carbon dioxide buildup. Egg turning mechanisms, either manual or automatic, prevent the developing embryo from sticking to the shell membrane – a consistent process like regular Blue Cross Blue Shield check-ups.
A thermometer and hygrometer are essential for monitoring temperature and humidity levels. The water pan, egg trays, and a viewing window complete the setup. Understanding the function of each component, and how they interact, is crucial for successful hatching. Proper assembly and maintenance, akin to understanding your VSP account details, will maximize your incubator’s performance.
Temperature Control & Calibration
Maintaining a precise temperature is vital, mirroring the importance of understanding your VSP vision benefits. Little Giant incubators rely on a thermostat to regulate the heating element. However, thermostats aren’t always perfectly accurate, necessitating calibration. Use a calibrated thermometer – separate from the incubator’s built-in one – to verify the internal temperature.
If a discrepancy exists, adjust the thermostat accordingly. Small adjustments are key; avoid large changes that could shock the developing embryos. Consistent monitoring, like checking your VSP account for coverage details, is crucial. Temperature fluctuations can significantly impact hatch rates, similar to how neglecting eye health can affect overall well-being.
Record temperature readings regularly to identify any trends or inconsistencies. Consider the ambient temperature; a cold room will require more heating, while a warm room may need less. Proper calibration and diligent monitoring, much like utilizing Blue Cross Blue Shield resources, ensure optimal incubation conditions. Stability is paramount for successful hatching;
Humidity Management: Water Trays & Ventilation
Humidity, like accessing your VSP vision benefits, requires careful management within the incubator. Little Giant incubators utilize water trays to regulate humidity levels. The amount of water needed varies depending on the incubator model, ambient humidity, and stage of incubation. Generally, increased humidity is crucial during the final days before hatching, softening the shell for easier pipping.
Ventilation plays a complementary role, removing excess moisture and providing fresh oxygen. Adjustable vents allow you to control airflow. Insufficient ventilation can lead to a buildup of carbon dioxide, hindering development, similar to limited access to healthcare resources. Conversely, excessive ventilation can lower humidity too quickly.
Monitor humidity levels with a hygrometer, adjusting water tray levels and vent openings as needed; Maintaining the correct balance, much like understanding your Blue Cross Blue Shield plan, is essential for healthy embryo development. Regular observation and adjustments are key to a successful hatch, ensuring optimal conditions for the chicks.
Egg Turning Mechanisms: Manual vs. Automatic
Little Giant incubators offer both manual and automatic egg turning options, mirroring the choices available when managing your VSP vision plan – self-service or automated assistance. Manual turning requires the user to rotate eggs at least three times daily, ensuring embryos don’t stick to the shell membrane. This method demands diligence and consistency, much like scheduling regular eye exams.
Automatic egg turners, a convenient feature, gently rotate eggs at pre-set intervals, freeing you from this task. These systems typically utilize a tilting or rolling mechanism. While more expensive initially, they provide consistent turning and reduce the risk of human error, similar to the ease of accessing benefits through your My Account Page.
Regardless of the method, proper turning is vital for embryo development. It prevents adhesion and ensures even temperature distribution. Stop turning eggs three days before the expected hatch date (“lockdown”), allowing chicks to position for pipping. Choosing between manual and automatic turning depends on your commitment and incubator model.
Preparing Eggs for Incubation
Proper egg preparation is crucial for successful hatching, much like understanding your VSP vision benefits before needing them. Begin by selecting clean eggs, free from cracks, excessive dirt, or abnormalities. Avoid washing eggs, as this removes the protective bloom, potentially allowing bacteria to enter – similar to protecting your vision health.

Gently wipe any minor debris with a dry cloth. Store eggs pointed-end down for up to seven days before incubation, maintaining a temperature between 55-65°F (13-18°C) and a humidity of around 75%. This mimics the conditions needed for optimal embryo development, akin to Blue Cross Blue Shield’s support for your vision needs.
Before placing eggs in the incubator, allow them to warm to room temperature for several hours. This prevents thermal shock. Disinfect eggs with an approved incubator sanitizer, following the manufacturer’s instructions. Proper preparation maximizes hatch rates and ensures healthy chicks, just as preventative eye care ensures clear vision.
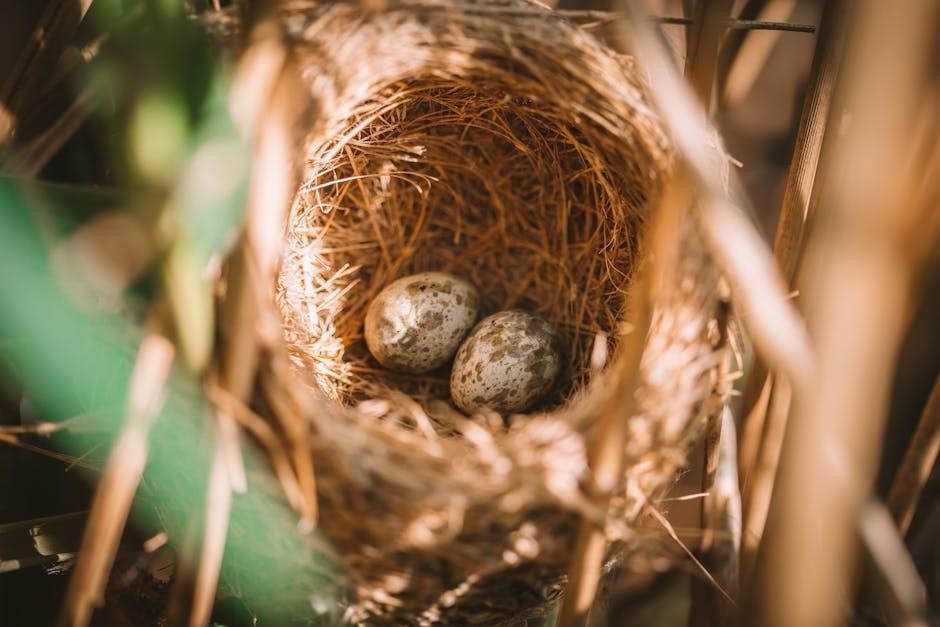
Selecting Fertile Eggs
Sourcing fertile eggs is the foundation of successful incubation, much like choosing an in-network VSP doctor for optimal vision care. Obtain eggs from a reputable source with healthy, actively mating birds. A good hen-to-rooster ratio is essential for consistent fertility – typically one rooster for 8-12 hens.
Freshly laid eggs generally exhibit higher fertility rates. Eggs older than seven days should be discarded, as fertility declines over time. Inspect eggs carefully for cracks, defects, or unusual shapes. These may indicate internal damage or developmental issues, similar to identifying potential health concerns during an eye exam with Blue Cross Blue Shield.
Consider the breed’s fertility rate; some breeds are naturally more fertile than others. Proper flock management, including adequate nutrition and disease prevention, significantly impacts egg fertility. Keep detailed records of egg collection dates and breeder performance to track fertility trends, ensuring a higher hatch rate, just like managing your VSP account for benefits tracking.

Candling Eggs: Identifying Development
Candling is a crucial process for monitoring embryo development, akin to a comprehensive eye exam offered through VSP to detect underlying health conditions. Begin candling around day 7-10 of incubation, using a bright, focused light source in a darkened room. A candling lamp or a strong LED flashlight works effectively.
Observe for visible blood vessels radiating from the yolk – this indicates a developing embryo. A clear air cell should also be present, growing larger as the chick develops. Infertile eggs will appear clear, with a uniform yolk and no visible blood vessels, similar to a clear vision benefit statement from Blue Cross Blue Shield.
Eggs with blood rings typically indicate early embryonic death. Discard these eggs to prevent potential contamination. Continue candling periodically throughout incubation to monitor progress and remove any non-viable eggs. Proper candling helps maintain a healthy incubation environment, maximizing hatch rates, much like proactive vision care maintains overall well-being with VSP.
Incubation Period by Species (Chicken, Duck, Quail)
Successful hatching relies on adhering to species-specific incubation periods, much like VSP offers customized vision plans for different life stages. Chickens typically require 21 days of incubation, starting from the date the eggs are set in the incubator. Ducks have a longer incubation period, averaging 28 days, while some breeds may extend to 35 days.
Quail eggs hatch much faster, generally within 17-23 days, depending on the quail variety. Accurate record-keeping is vital; mark each egg with the date set to track progress effectively. Maintaining consistent temperature and humidity, as supported by Blue Cross Blue Shield’s reliable health coverage, is paramount throughout these periods.
Lockdown, the period where egg turning ceases, begins around day 18 for chickens and quail, and day 25 for ducks. Adjust humidity levels during lockdown to facilitate successful hatching. Understanding these timelines, similar to understanding your VSP benefits, is key to maximizing hatch rates and raising healthy chicks.
Day 1-7: Early Incubation
The first week of incubation is critical for embryonic development, mirroring the importance of early detection through regular eye exams offered by VSP. Maintain a stable temperature of 99.5°F (37.5°C) and humidity around 50-55%. Consistent temperature, like reliable Blue Cross Blue Shield coverage, is crucial.
Egg turning should occur at least 3-5 times daily during this period, mimicking natural brooding. This prevents the embryo from sticking to the shell membrane. Avoid opening the incubator unnecessarily, as fluctuations can harm development. Proper ventilation is essential, but prevent drafts.
Candling is generally not recommended during the first week, as development is minimal. Focus on maintaining optimal conditions. Think of it like building a strong foundation – similar to choosing a customized VSP plan for long-term vision health. Careful monitoring and consistent care during these initial days significantly increase hatch success.
Day 8-14: Mid-Incubation
During days 8-14, embryonic development accelerates, requiring continued precise temperature control – around 99.5°F (37.5°C) – and humidity, maintained at 50-65%. Consistent monitoring, much like accessing your VSP benefits online, is key. Continue turning eggs at least 3-5 times daily, ensuring even development.
This is the ideal time for the first candling session. Observe for visible blood vessels, indicating a developing embryo. Infertile eggs or those with ceased development should be removed to prevent contamination, similar to removing unnecessary costs with a tailored Blue Cross Blue Shield plan.
Ventilation remains crucial, but avoid drastic changes. Maintaining stable conditions is paramount. Remember, like finding an in-network VSP doctor, consistency yields the best results. Proper air circulation supports healthy embryonic growth, setting the stage for successful hatching. Careful observation and diligent maintenance are vital during this mid-incubation phase.
Day 15-18: Late Incubation & Lockdown
As you approach hatching, days 15-18 mark the critical lockdown phase. Stop turning the eggs! This prevents positioning issues during pipping. Maintain a slightly higher humidity level, around 65-75%, to aid in shell penetration, much like easily accessing your VSP vision benefits.
Reduce ventilation slightly, but don’t eliminate it entirely. The incubator should remain undisturbed. Resist the urge to open it frequently; each opening alters the delicate environment. Think of it as protecting your Blue Cross Blue Shield coverage – minimal interference ensures optimal function.
Candling during this period can reveal chicks preparing to hatch. You may see the air sac enlarging. Do not assist chicks during hatching unless absolutely necessary. Patience is key. Like managing your VSP account, allowing the process to unfold naturally often yields the best outcome. Prepare the brooder for the imminent arrival of fluffy chicks!
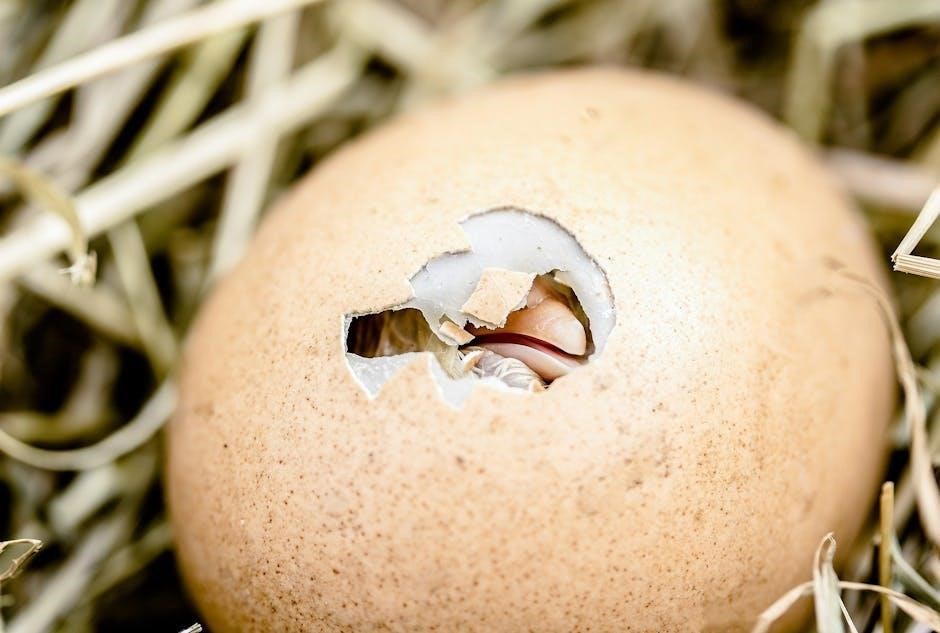
Hatching Process: Observing & Assisting
The hatching process typically begins around day 21 for chickens, though it varies by species. Observe quietly; chicks will pip (break through the shell) and then zip (create a larger opening); This can take 24-36 hours per chick, mirroring the time it takes to find an in-network VSP doctor.
Resist the urge to help unless a chick is clearly struggling after prolonged effort. Premature assistance can be fatal. A chick stuck with unabsorbed yolk sac needs minimal help – gently position it. Maintaining stable temperature and humidity, similar to consistent Blue Cross Blue Shield benefits, is crucial.
Avoid removing shell fragments; chicks usually manage this themselves. Once dry and fluffy, chicks can be moved to the prepared brooder. Like accessing your VSP vision plan details, careful observation and minimal intervention are best. Enjoy the reward of your incubation efforts!
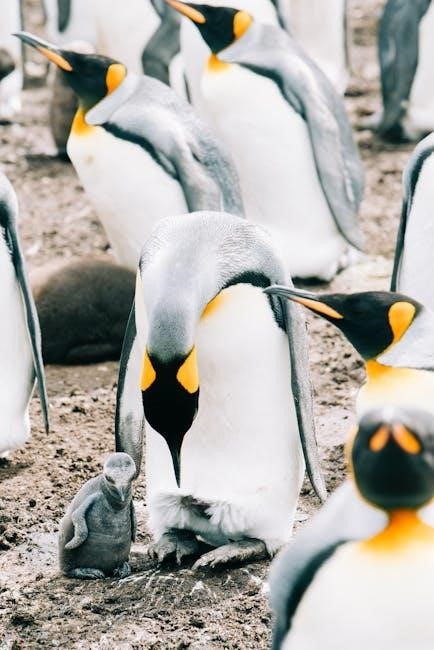
Post-Hatch Care: Brooding & Nutrition
Newly hatched chicks require a warm, draft-free environment – a brooder – mimicking the consistent care offered by VSP for vision needs. Maintain a temperature of 90-95°F (32-35°C) initially, decreasing by 5°F each week, similar to managing your VSP account online.
Provide chick starter feed and fresh, clean water in easily accessible containers. Grit is essential for digestion, especially if not on starter feed. Observe chicks closely for signs of illness, like lethargy or ruffled feathers, much like monitoring your health with regular eye exams through Blue Cross Blue Shield.
Ensure adequate ventilation without creating drafts. Clean the brooder regularly to prevent disease. As chicks grow, offer more space and enrichment. Just as VSP offers customized plans, adjust the brooder setup to meet their evolving needs. Proper brooding and nutrition are vital for healthy chick development.
Troubleshooting Common Incubator Problems
Consistent temperature and humidity are crucial; fluctuations can hinder hatching, much like accessing benefits requires a functioning VSP account. If temperature drops, check the heating element and thermostat. For high temperatures, ensure adequate ventilation and proper thermostat setting – similar to finding an in-network doctor through VSP.
Low humidity can cause eggs to dry out; add water to trays or use a humidifier. Excessive humidity risks bacterial growth; increase ventilation. Hatching failures can stem from infertile eggs, improper temperature, or humidity. Like diagnosing vision issues with an eye exam from Blue Cross Blue Shield, pinpointing the cause is key.
Power outages require immediate action – insulate the incubator and, if prolonged, consider a backup power source. Regularly calibrate the thermometer and hygrometer for accuracy. Addressing issues promptly maximizes hatch rates, mirroring the importance of timely vision care with VSP.
Temperature Fluctuations & Solutions
Maintaining a stable temperature is paramount for successful hatching, much like consistent vision benefits through VSP are essential for eye health. Sudden drops often indicate a faulty heating element or thermostat; verify functionality and replace if needed. Conversely, overheating suggests thermostat malfunction or insufficient ventilation – akin to needing a new prescription from your Blue Cross Blue Shield eye doctor.
External factors like room temperature and incubator placement also contribute. Avoid drafts and direct sunlight. Regularly calibrate your thermometer against a known accurate source. Small fluctuations (±1°F) are generally tolerable, but larger swings require immediate attention. Think of it as managing your VSP account – small adjustments can prevent bigger issues.
Insulating the incubator can help buffer against external temperature changes, especially during power outages. Consistent monitoring and proactive adjustments are key, mirroring the importance of annual eye exams to detect over 270 health conditions, covered by VSP.
Humidity Issues & Adjustments
Proper humidity levels are crucial, much like accessing your VSP vision benefits requires understanding your coverage. Too little humidity leads to eggs drying out, hindering chick development; too much can cause drowning or impede gas exchange. Monitor humidity using a reliable hygrometer, calibrating it regularly for accuracy – similar to ensuring your Blue Cross Blue Shield information is current.
Adjust humidity by altering the water surface area in the trays. More surface area equals higher humidity. Ventilation also plays a role; increased ventilation lowers humidity. Consider the incubator’s stage – higher humidity is needed during lockdown to prevent membranes from sticking, like needing specialized eyewear covered by VSP.
Observe eggshell porosity; some breeds require different humidity levels. Consistent monitoring and adjustments are vital, mirroring the proactive management of your VSP account. Remember, maintaining optimal humidity is as important as finding an in-network eye doctor through VSP for maximizing benefits.
Egg Hatching Failures: Identifying Causes
Hatching failures can be disheartening, much like discovering a limitation in your VSP vision coverage. Common causes include improper temperature regulation, incorrect humidity, or insufficient egg turning – mirroring the need for consistent account management with VSP.
Early failures often stem from infertile eggs or embryonic death due to parental health. Mid-incubation failures can result from temperature fluctuations or humidity imbalances, similar to unexpected costs with healthcare. Late-stage failures might indicate a lack of calcium or improper lockdown procedures, akin to needing specialized eyewear not fully covered by Blue Cross Blue Shield.
Examine unhatched eggs carefully. Blood rings suggest embryonic death around day 7, while clear eggs indicate infertility. Delayed hatches can point to temperature issues. Thorough record-keeping, like tracking your VSP benefits usage, helps pinpoint problems. Remember, understanding the cause is crucial for improving future hatch rates, just as understanding your VSP plan maximizes your vision care.
Cleaning and Disinfecting Your Incubator
Maintaining a hygienic incubator environment is paramount, much like ensuring your VSP account details are secure. After each hatch, thoroughly clean and disinfect all components to prevent bacterial or fungal growth – similar to protecting your vision health.
Begin by removing all debris and washing surfaces with warm, soapy water. A mild disinfectant, such as a diluted bleach solution (1:10 ratio), can then be applied. Ensure complete rinsing to remove any residue, mirroring the clarity Blue Cross Blue Shield aims to provide with vision care.
Pay close attention to water trays, turning mechanisms, and the incubator’s interior. Allow all parts to dry completely before reassembly. Regular cleaning, like consistently checking your VSP coverage, minimizes potential issues. Proper disinfection safeguards future hatches, just as preventative eye exams safeguard your eyesight. Remember, a clean incubator is a healthy incubator, supporting successful hatching rates and mirroring the benefits of a well-managed VSP plan.
Incubator Maintenance for Longevity
Extending the lifespan of your Little Giant incubator, much like maintaining consistent VSP vision benefits, requires proactive care. Regular inspection of electrical components is crucial; check cords for damage and ensure proper grounding – akin to verifying your Blue Cross Blue Shield coverage details.
Lubricate moving parts, such as the turning motor (if applicable), to prevent wear and tear. Clean ventilation holes to maintain optimal airflow, mirroring the importance of clear vision for detecting health conditions. Avoid abrasive cleaners that could damage the incubator’s surfaces, similar to protecting your eyewear with proper care.
Store the incubator in a dry, dust-free environment when not in use. Periodically test the thermostat and humidity controls for accuracy, ensuring consistent performance, much like regularly accessing your VSP account. Proper maintenance, like scheduling annual eye exams, prevents costly repairs and ensures years of reliable service. A well-maintained incubator, like a comprehensive VSP plan, delivers long-term value.
Safety Precautions When Using a Little Giant Incubator
Prioritizing safety when operating your Little Giant incubator is paramount, much like ensuring you understand your VSP vision benefits. Always unplug the incubator before performing any maintenance or cleaning – a crucial step, similar to protecting your personal information when managing your VSP account.
Keep the incubator out of reach of children and pets to prevent accidental damage or injury. Never operate the incubator with a damaged cord or plug; replace them immediately, mirroring the importance of promptly addressing any issues with your Blue Cross Blue Shield coverage.
Avoid immersing the incubator in water or any other liquid. Ensure adequate ventilation to prevent overheating, akin to the need for clear vision to detect potential health concerns. Do not modify the incubator in any way, as this could compromise its safety features. Regular safety checks, like scheduling annual eye exams through VSP, are essential for worry-free operation and long-term reliability.
Little Giant Incubator Model Variations & Features
Little Giant offers a diverse range of incubators, catering to various flock sizes and hatching needs, much like VSP provides tailored vision plans for different lifestyles. Basic still-air models are ideal for smaller batches, offering simplicity and affordability, similar to the straightforward access VSP members have to their coverage details.
Forced-air incubators provide more consistent temperature and humidity, crucial for larger-scale hatching, mirroring the comprehensive benefits offered by Blue Cross Blue Shield through VSP. Automatic egg turning models reduce manual labor, ensuring even development, comparable to the convenience of online account management with VSP.
Features vary across models, including digital temperature controls, humidity displays, and adjustable ventilation. Some models include built-in candlers for easy egg monitoring, akin to the ability to find an in-network eye doctor through VSP. Understanding these variations allows you to select the incubator best suited to your specific requirements, ensuring a successful hatch, just as choosing the right VSP plan ensures optimal vision care.
Resources for Further Learning & Support
Successfully utilizing a Little Giant incubator, like navigating VSP vision benefits, often requires additional resources. The official Little Giant website provides detailed product manuals, FAQs, and troubleshooting guides, mirroring VSP’s comprehensive online support portal.
Poultry-focused online forums and communities offer valuable peer-to-peer support, allowing users to share experiences and solutions, similar to how VSP members can connect and learn from each other. Numerous books and articles delve into the intricacies of incubation, providing in-depth knowledge, much like resources detailing the importance of annual eye exams.
Local agricultural extension offices often host workshops and seminars on poultry keeping, offering hands-on learning opportunities. VSP also provides access to a network of eye doctors for personalized assistance. Don’t hesitate to contact Little Giant’s customer support for direct assistance with any technical issues, paralleling the dedicated support available from Blue Cross Blue Shield and VSP for vision care needs.
Frequently Asked Questions (FAQ)
Q: Can I incubate different types of eggs together? A: While possible, success rates vary; similar incubation periods are best, much like choosing a VSP plan suited to your needs.
Q: How often should I add water to the incubator? A: Monitor humidity levels daily and replenish water as needed, ensuring consistent conditions, similar to regularly checking your VSP coverage.
Q: What if my incubator’s temperature fluctuates? A: Ensure proper ventilation and calibrate the thermostat; consistent temperature is vital, like reliable Blue Cross Blue Shield benefits.
Q: Is candling necessary? A: Yes, candling helps identify fertile eggs and monitor development, akin to annual eye exams detecting health conditions through VSP.
Q: What does “lockdown” mean? A: Lockdown refers to ceasing egg turning and increasing humidity during the final days, mirroring the stability of a long-term VSP vision plan.
Q: Where can I find a network doctor? A: Utilize Little Giant’s support resources or online forums, similar to finding a VSP network eye doctor.

Leave a Reply