
Welcome! This manual guides you through safe operation, installation, and maintenance of your Castle pellet stove. Understanding these instructions ensures efficient heating and longevity.
Important: Read all sections before using the stove. Improper installation or operation can create hazards, potentially leading to property damage or personal injury.
Historical Note: Like Sterling Castle’s enduring structure, your Castle pellet stove is built for reliable performance, offering warmth and comfort for years to come.
Understanding Your Stove
Your Castle pellet stove is a sophisticated heating appliance designed for efficient and environmentally responsible warmth. It utilizes compressed wood or biomass pellets as fuel, automatically feeding them into a burn pot for consistent heat output. Unlike traditional wood stoves, pellet stoves offer precise temperature control and reduced emissions.
Key Features: Familiarize yourself with the control panel, hopper (pellet storage), burn pot, heat exchanger, and exhaust vent. The digital display provides information on stove settings, temperature, and potential error codes. The auger system delivers pellets from the hopper to the burn pot, while the fan circulates warm air throughout the room.
Like the detailed plots of Richard Castle’s novels, your stove has intricate components working in harmony. Understanding these elements – mirroring the investigative work of Beckett – will aid in proper operation and troubleshooting. Regular inspection, similar to a thorough manuscript review, is crucial for optimal performance.
Important Safety Precautions
Prioritize safety! Always ensure proper ventilation to prevent carbon monoxide buildup – a silent and deadly hazard. Never store flammable materials near the stove, maintaining a safe clearance of at least three feet. Keep children and pets supervised around the hot surfaces.
Electrical Safety: Disconnect power before performing any maintenance or cleaning. Do not operate the stove with a damaged power cord. Grounding is essential to prevent electrical shock, much like the solid foundations of Sterling Castle.
Fuel Handling: Use only approved pellet fuel. Avoid using damaged or contaminated pellets. Never introduce flammable liquids to the stove. Like Castle solving complex crimes, preventative measures are key. Ignoring these precautions could lead to fire, burns, or carbon monoxide poisoning – treat them with utmost seriousness.
Installation & Setup
Proper installation is crucial! Carefully follow these steps for optimal performance and safety, ensuring a secure and efficient heating system for your home.
Choosing the Right Location
Selecting an appropriate location for your Castle pellet stove is paramount for both safety and efficient operation. Consider a level, non-combustible floor, ensuring ample clearance from walls, furniture, and flammable materials – a minimum of 36 inches is generally recommended. Avoid areas with high foot traffic or where obstructions could interfere with operation or maintenance.
Ventilation is key: The location must allow for proper venting to the outside, adhering strictly to local building codes and the stove’s specifications. Proximity to a suitable chimney or vent pipe is essential. Ensure the floor can support the stove’s weight, especially when loaded with pellets. Like the strategic positioning of Sterling Castle, careful placement maximizes defensive capabilities, your stove’s location maximizes heating efficiency and safety.
Accessibility matters: Choose a spot easily accessible for pellet fuel loading, ash removal, and routine maintenance. Avoid damp or humid areas, as moisture can damage the stove and fuel.
Ventilation Requirements & Chimney Installation
Proper ventilation is critical for safe and efficient operation of your Castle pellet stove. A dedicated, properly sized vent pipe is mandatory, constructed of approved materials like stainless steel. Never connect to a chimney used for wood or gas appliances. The vent pipe must extend through the roof, terminating above the roofline to ensure adequate draft, similar to the defensive towers of a castle.
Installation guidelines must strictly adhere to local building codes and the stove’s specifications. Incorrect installation can lead to carbon monoxide buildup, a serious hazard. Professional installation is highly recommended. Ensure all connections are airtight, using approved sealant. Regularly inspect the vent pipe for obstructions or damage, like the vigilant watch kept at castle ramparts.
Draft and airflow are vital; consult the manual for specific requirements based on your stove model and chimney height.
Connecting to Power Supply

Electrical requirements for your Castle pellet stove are clearly outlined on the unit’s data plate. Typically, a dedicated 120V, 15-amp circuit is needed. Do not use extension cords or adapters; a direct connection to a grounded outlet is essential for safety and optimal performance, much like a castle’s secure power source.
Before connecting, ensure the power switch is in the “OFF” position. The stove’s electrical components control ignition, fan speed, and monitoring systems. Improper wiring can damage the stove and create a fire hazard. If you are unsure about any aspect of the electrical connection, consult a qualified electrician.
Grounding is crucial for preventing electrical shock. Verify the outlet is properly grounded before plugging in the stove. Regularly inspect the power cord for damage.

Operating Your Castle Pellet Stove
Enjoy efficient warmth! This section details fuel loading, startup, shutdown, and heat adjustments, mirroring Richard Castle’s meticulous plot construction for optimal results.
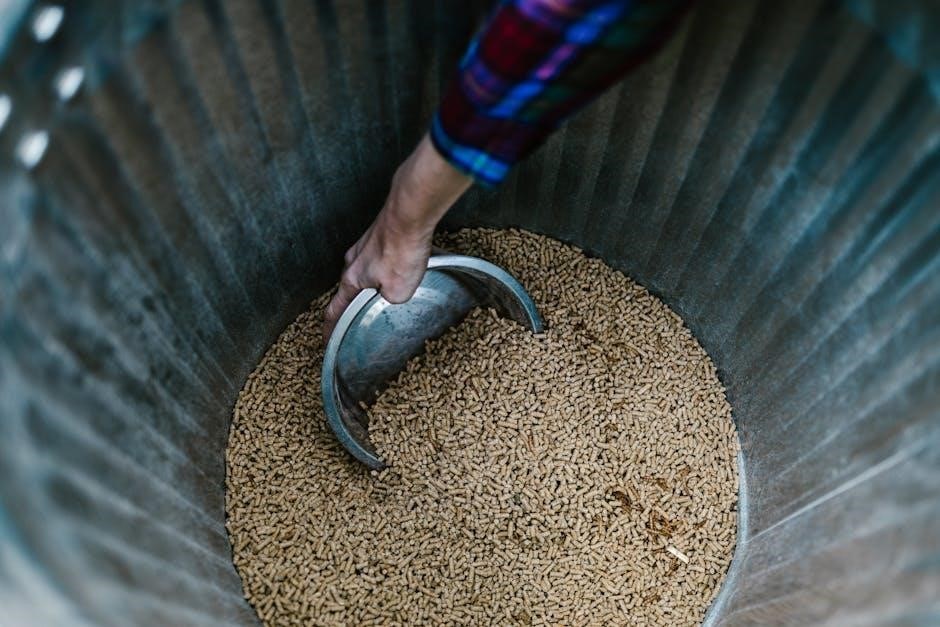
Loading Pellet Fuel
Fuel Selection: Your Castle pellet stove is designed to operate with high-quality, dry wood pellets that meet the Pellet Fuels Institute (PFI) standards. Using substandard pellets can lead to inefficient burning, increased creosote buildup, and potential damage to your stove. Avoid pellets containing excessive fines or moisture.
Hopper Capacity: The hopper’s capacity varies by model; consult your stove’s specifications for precise details. Do not overfill the hopper, as this can cause jamming and impede proper pellet flow; Regularly check the fuel level, especially during extended cold periods, to prevent running out of fuel overnight.
Loading Procedure: Ensure the stove is completely cool before adding fuel. Carefully pour pellets into the hopper, avoiding spillage. A dust mask is recommended during loading to minimize inhalation of pellet dust. Like a well-crafted mystery, proper fuel loading is crucial for a smooth operation.
Important Note: Never use any fuel other than approved wood pellets. Do not mix pellets with other materials, such as wood chips or sawdust. This could create dangerous conditions and void your warranty.
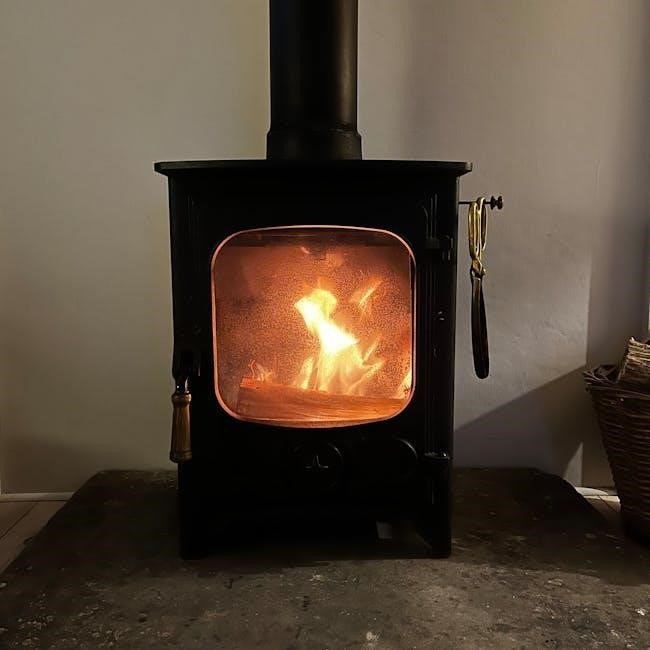
Starting and Shutting Down Procedures
Starting Your Stove: Ensure the hopper is adequately filled with approved wood pellets. Turn the power switch to the “ON” position. The stove will initiate its automatic ignition sequence, which may include an auger motor priming and a glow plug heating. Allow the stove to cycle through its startup phase – do not interrupt this process. Like a detective solving a case, patience is key.
Normal Operation: Once ignited, the stove will automatically regulate pellet feed and airflow to maintain the desired temperature. Monitor the stove during the initial burn cycle to ensure proper operation.
Shutting Down: To shut down, turn the power switch to the “OFF” position. The stove will complete its burn cycle, allowing remaining pellets to combust. Do not unplug the stove immediately; allow it to cool completely before performing any maintenance.
Emergency Shutdown: In case of emergency, immediately turn off the power switch and disconnect the stove from the power supply.
Adjusting Heat Output & Fan Speed
Heat Output Control: Your Castle pellet stove offers adjustable heat output settings, typically controlled via a digital interface or manual dial. Increasing the heat setting increases pellet feed rate, resulting in a higher flame and greater heat production. Adjust gradually to achieve desired comfort levels, much like crafting a compelling narrative.
Fan Speed Adjustment: Fan speed controls the rate at which heated air is circulated throughout the room. Higher fan speeds distribute heat more quickly but may create more noise. Lower speeds provide quieter operation with less immediate heat distribution.
Optimizing Performance: Experiment with different heat and fan speed combinations to find the optimal settings for your home and preferences. Consider room size, insulation, and desired temperature when making adjustments.
Monitoring: Regularly monitor the stove’s performance and adjust settings as needed to maintain consistent and efficient heating.

Maintenance & Cleaning
Regular upkeep is crucial for optimal performance and longevity. Consistent cleaning, like meticulous plot editing, ensures your Castle stove operates safely and efficiently.
Daily Cleaning Procedures
Essential Daily Tasks: To maintain peak efficiency and prevent potential issues, a few simple daily cleaning procedures are necessary. After each use, or at the end of a heating cycle, carefully remove ashes from the firebox. Allow the ashes to cool completely before disposal in a metal container with a tight-fitting lid – never in a combustible receptacle.
Glass Door Cleaning: Regularly inspect the glass door for soot buildup. Use a specialized pellet stove glass cleaner and a soft cloth to gently wipe away any residue. Avoid abrasive cleaners, as they can scratch the glass. A clean glass door allows for optimal viewing of the flame and ensures efficient heat transfer.

Burn Pot Inspection: Briefly check the burn pot for any obstructions or unburnt pellets. Remove any debris to ensure proper airflow and combustion. Consistent daily attention, much like a writer’s daily editing, keeps everything running smoothly.
Weekly Inspection Checklist
Comprehensive Weekly Review: A thorough weekly inspection is crucial for ensuring the continued safe and efficient operation of your Castle pellet stove. Begin by examining the venting system for any obstructions or disconnections. Verify that all connections are secure and that there are no signs of damage or corrosion.
Pellet Level & Quality: Check the pellet fuel level in the hopper and ensure the pellets are dry and free of dust or debris. Damp or contaminated pellets can lead to poor combustion and increased creosote buildup. Like a detective examining clues, attention to detail is key.
Fan & Motor Check: Inspect the combustion blower fan and motor for any unusual noises or vibrations. Ensure the fan blades are clean and free of obstructions. A properly functioning fan is vital for efficient airflow and heat distribution.
Annual Maintenance & Professional Servicing
Yearly Comprehensive Check: Schedule a professional servicing annually to maintain peak performance and safety. A qualified technician will thoroughly inspect all components, including the combustion chamber, heat exchanger, and venting system. This mirrors the detailed investigations of Richard Castle!
Creosote Removal: Professional cleaning includes creosote removal from the venting system, minimizing fire hazards. Excessive creosote buildup restricts airflow and reduces heating efficiency. Like capturing assassins, prevention is paramount.
Component Inspection & Lubrication: The technician will inspect and lubricate moving parts, ensuring smooth operation and extending the lifespan of your stove. They’ll also check for wear and tear, recommending replacements as needed. This proactive approach guarantees reliable warmth for years.

Troubleshooting Common Issues
Diagnostic Support: This section details solutions for typical problems, like ignition failures or reduced heat. Refer to error codes for precise guidance and resolution.
Stove Not Igniting
Possible Causes & Solutions: If your Castle pellet stove fails to ignite, begin with simple checks. Ensure the pellet fuel level is sufficient; a low hopper can prevent startup. Verify the power supply is securely connected and the stove receives electricity. Inspect the igniter for visible damage or debris, cleaning it carefully if necessary.
Airflow & Fuel Delivery: Confirm proper airflow by checking the ventilation system for obstructions. A blocked vent restricts oxygen flow, hindering ignition. Examine the auger and fuel delivery system for clogs or jams, which can prevent pellets from reaching the burn pot. Sometimes, older pellets can become damp, making ignition difficult; try fresh fuel.
Reset & Advanced Checks: Attempt a stove reset following the procedures outlined in the ‘Starting and Shutting Down Procedures’ section. If the issue persists, consult the error code display for specific diagnostics. If error codes don’t resolve the problem, professional servicing may be required to diagnose and repair more complex issues within the ignition system.
Poor Heat Output
Identifying the Issue: If your Castle pellet stove isn’t providing adequate heat, several factors could be at play. First, confirm sufficient pellet fuel is loaded and the hopper isn’t running low. Check the stove’s settings; a lower heat output or fan speed setting will naturally reduce warmth. Ensure windows and doors are properly sealed to prevent heat loss, similar to maintaining the integrity of a castle’s walls.
Airflow & Combustion: Inspect the ventilation system for obstructions, as restricted airflow impacts combustion efficiency. A buildup of ash in the burn pot can also hinder heat production; perform a thorough cleaning. Verify the pellets are of good quality and dry, as damp fuel burns inefficiently.
Professional Evaluation: If these checks don’t improve heat output, a professional servicing may be needed to assess the stove’s internal components and ensure optimal performance. They can identify issues like a malfunctioning fan or a damaged burn pot.
Error Codes & Their Meanings
Decoding Stove Signals: Your Castle pellet stove utilizes error codes to diagnose operational issues. These codes appear on the control panel display, providing valuable insight into the problem. Refer to the complete error code list in the appendix of this manual – much like deciphering historical crest badges, understanding these codes is key.
Common Codes: “E1” typically indicates a low hopper level, requiring a pellet refill. “E2” often signals an issue with the auger motor, potentially a jam or malfunction; “E3” suggests a problem with the exhaust temperature sensor. “E4” may point to a flame detection error.
Troubleshooting Steps: For each code, the manual provides specific troubleshooting steps. If you cannot resolve the issue, contact a qualified technician. Ignoring error codes can lead to further damage or unsafe operation. Remember, prompt attention is crucial, similar to addressing structural concerns in a castle.

Parts & Components
Essential Elements: Familiarize yourself with key components – the hopper, auger, burn pot, blower, and control board. Replacement parts ensure lasting performance, like castle fortifications.
Identifying Key Components
Hopper: This is the reservoir holding the pellet fuel, typically located on top of the stove. Its capacity determines how frequently you need to reload.
Auger: The auger is a rotating screw mechanism that delivers pellets from the hopper to the burn pot at a controlled rate. Regular inspection ensures smooth operation.
Burn Pot: This is where the pellets are ignited and burned to produce heat. It’s designed for efficient combustion and often features a grate for ash removal.
Blower/Fan: The blower circulates heated air throughout the room. Adjusting fan speed controls the heat distribution. Maintaining a clean blower is crucial for optimal performance.
Control Board: The “brain” of the stove, managing ignition, fuel feed, fan speed, and temperature settings. Understanding the control board’s functions is vital for troubleshooting.
Exhaust Vent: This safely directs combustion gases outside. Proper installation, similar to castle defenses, is paramount for safety.
Heat Exchanger: Transfers heat from the burn pot to the air circulated by the blower.
Replacement Parts Information
Genuine Castle Parts: Always use genuine Castle replacement parts to maintain stove performance and safety. Non-approved parts may void your warranty and pose risks.
Ordering Parts: Contact your authorized Castle pellet stove dealer directly. Provide your stove’s model number and serial number for accurate ordering. Online parts catalogs are also available.
Common Replacements: Frequently replaced parts include the auger motor, blower motor, igniter, and various sensors. Keep a small stock of essential consumables like fuses.
Part Diagrams: Detailed exploded view diagrams are available in this manual and online, aiding in identification and assembly. Refer to these when ordering.
Safety First: Disconnect power before replacing any electrical components. If unsure, consult a qualified technician – much like castle maintenance required skilled artisans.
Warranty Considerations: Some parts may be covered under warranty. Retain your purchase receipts for claim eligibility.

Warranty Information
Coverage: Your Castle pellet stove is covered against manufacturing defects. Review the detailed warranty card for specific terms, durations, and limitations.
Claims: Submit all warranty claims through your authorized Castle dealer, providing proof of purchase and a description of the issue.
Coverage Details
Limited Warranty: Castle Pellet Stoves provides a limited warranty covering defects in materials and workmanship for a specified period, beginning from the original date of purchase; This warranty applies only to the original purchaser and is non-transferable. The duration of coverage varies depending on the specific component; for example, the stove body typically has a longer warranty period than individual parts like fans or control boards.
What is Covered: The warranty covers repair or replacement of defective parts, at Castle’s discretion. This includes components that malfunction during normal use, as outlined in this manual. Coverage extends to failures resulting from manufacturing errors, not from improper installation, misuse, neglect, accidents, or unauthorized modifications.
What is Not Covered: This warranty does not cover damage caused by improper venting, use of non-approved fuels, lack of regular maintenance (as detailed in the manual), acts of God, or shipping damage. Consumable parts, such as gaskets and firebricks, are also typically excluded from warranty coverage. Any alterations or repairs performed by unauthorized personnel will void the warranty.
Claim Procedures
Initiating a Claim: To initiate a warranty claim, contact Castle Pellet Stoves customer support immediately upon discovering a defect. Have your original proof of purchase (receipt or invoice) and the stove’s model and serial number readily available. A detailed description of the issue, including any error codes displayed, is also required.
Documentation: You may be asked to provide photographic or video evidence of the defect. Castle may require a qualified technician to inspect the stove to verify the claim. All inspection and repair work must be authorized by Castle prior to commencement. Retain all documentation related to the claim, including repair invoices and correspondence.
Return Authorization: If a part needs to be returned, Castle will issue a Return Merchandise Authorization (RMA) number. Ship the defective part, securely packaged, to the address provided with the RMA. Shipping costs for returned parts may be the responsibility of the customer, depending on the warranty terms. Castle will process the claim and determine the appropriate resolution.
Leave a Reply