Lazy Spa Hot Tub Instructions: A Comprehensive Guide
Embark on relaxation! This guide details Lay-Z-Spa setup, from unboxing to winterizing. Learn about inflating, water chemistry, troubleshooting, and maintaining your soothing inflatable haven.
Understanding Your Lay-Z-Spa
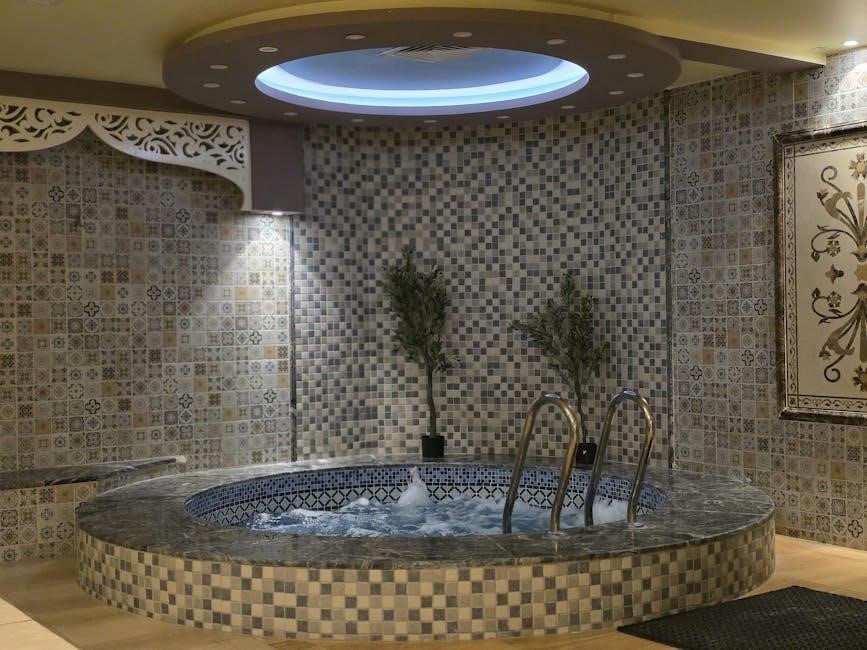
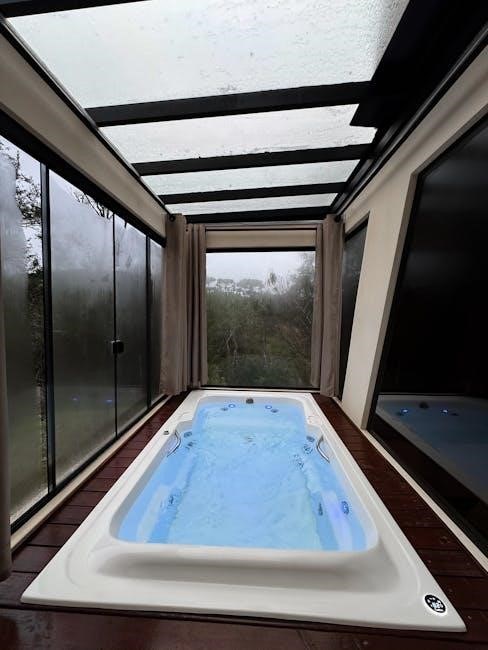
Lay-Z-Spa hot tubs represent an accessible entry point into the world of home relaxation, offering a blend of convenience and affordability. Unlike traditional, permanently installed hot tubs, Lay-Z-Spas are inflatable, making them portable and easier to set up. However, understanding the core components and operational principles is crucial for maximizing enjoyment and ensuring longevity.
These spas utilize AirJet massage systems, employing strategically placed jets to create a bubbling, soothing experience. The inflatable structure is typically constructed from durable, multi-layered PVC, providing both structural integrity and comfort. A key element is the filter pump, responsible for heating the water, circulating it for cleanliness, and powering the massage jets.

The term “lazy” in Lay-Z-Spa doesn’t refer to a lack of functionality, but rather to the ease of use and relaxed experience they provide. Proper maintenance, including water chemistry balancing and filter cleaning, is vital. Recognizing the difference between a truly “lazy” afternoon and a potentially problematic “soggy” spa (indicating an air leak) is also important for responsible ownership. Understanding these basics sets the stage for a successful and enjoyable spa experience.
Unboxing and Component Check
Carefully unpack your Lay-Z-Spa, taking inventory of all included components. The primary elements should include the inflatable spa liner, the filter pump unit, a filter cartridge, a repair patch kit, and potentially foam walls for added insulation (depending on the model). A detailed instruction manual is also essential – retain this for future reference.
Visually inspect the spa liner for any punctures, tears, or manufacturing defects before inflation. Examine the filter pump for damage, ensuring the power cord is intact. Verify the filter cartridge is present and undamaged. The repair patch kit should contain adhesive patches and potentially glue – confirm all items are included.
Cross-reference the contents against the parts list in the instruction manual. Missing components should be reported to the retailer immediately. Do not attempt to assemble the spa if parts are missing or damaged. A thorough component check upfront prevents frustration and ensures a safe and enjoyable setup process. Confirm you have everything needed before proceeding to the next step.
Choosing the Ideal Location
Selecting the right spot is crucial for your Lay-Z-Spa’s longevity and your enjoyment. Prioritize a level surface – even a slight incline can strain the pump and compromise structural integrity. Avoid placing the spa directly on concrete, as it lacks necessary insulation and can be abrasive.
Consider proximity to a grounded electrical outlet. Never use extension cords; a dedicated, GFCI-protected outlet is essential for safety. Ensure the location offers some privacy and shelter from strong winds, which can affect water temperature and potentially damage the spa. Avoid areas directly under trees to minimize debris accumulation.
Think about accessibility throughout the year. Will snow accumulation be an issue in winter? Is the location easily accessible for maintenance and cleaning? A flat, level, shaded, and protected area near a suitable power source is ideal. Remember, once inflated, moving the spa is difficult, so choose wisely! Proper location selection sets the stage for years of relaxation.
Preparing the Base Surface
A solid foundation is paramount for your Lay-Z-Spa. While a level lawn seems suitable, it’s rarely sufficient. The weight of the filled spa can cause sinking and uneven stress, potentially damaging the liner and pump. Therefore, creating a dedicated base is highly recommended.
Ideal base options include a 4-inch thick layer of compacted gravel, a paved patio, or a dedicated wooden deck. If using gravel, ensure it’s thoroughly leveled and covered with a protective layer like outdoor carpeting or a heavy-duty tarp to prevent punctures. For wooden decks, verify they can support the substantial weight – consult a structural engineer if unsure.
Remove any sharp objects – rocks, roots, or debris – from the chosen area. A smooth, even surface distributes weight evenly, minimizing stress on the spa’s components. Consider adding a thermal insulation layer beneath the base to retain heat and reduce energy consumption. Proper base preparation safeguards your investment and ensures a stable, enjoyable spa experience.
Inflating the Hot Tub
Initiating inflation is straightforward using the included air pump. Begin by laying the Lay-Z-Spa flat and clearing the immediate area. Locate the air valve – typically a two-in-one valve for inflation and deflation. Attach the air pump nozzle securely to the valve, ensuring a tight seal to prevent air leakage.
Start the pump and observe the spa gradually inflate. Avoid overinflation, as this can stress the seams and potentially cause damage. The spa will become firm but still have some give. Once inflated, close the valve cap tightly to retain the air. It’s normal for the material to stretch slightly during initial inflation.
If the spa feels “soggy” after inflation, it indicates an air leak. Locate the leak using a soapy water solution – bubbles will form at the puncture point. Repair small leaks with a patching kit (sold separately). Ensure the pump is compatible with your spa’s valve type. Proper inflation is crucial for structural integrity and optimal performance.
Connecting the Filter Pump
After inflation, connecting the filter pump is essential for water circulation, heating, and filtration. Locate the pump connections on the spa’s exterior – these are typically two hose fittings. Ensure the pump is placed on a flat, stable surface near a grounded electrical outlet.
Attach the hoses securely to the pump and the spa fittings. Hand-tighten the connections, then use the provided clamps to secure them further, preventing leaks. Incorrect hose attachment can lead to reduced performance or water loss. Double-check that the hoses aren’t kinked or twisted.
Before plugging in the pump, verify the voltage matches your electrical supply. Once connected, the pump will initiate a priming sequence. Allow it to run for a few minutes to remove air from the system. The pump’s digital display will indicate its operational status. Proper connection ensures efficient heating and clean, clear water.
Water Filling Instructions
With the filter pump connected, it’s time to fill your Lay-Z-Spa. Use a garden hose with a filter attachment to prevent debris from entering the spa. Begin filling slowly, allowing the walls to expand gradually; Avoid overfilling, as this can strain the seams and potentially cause damage.
The water level should be maintained between the minimum and maximum fill lines indicated inside the spa. These lines are crucial for proper pump operation and Jet functionality. Filling beyond the maximum line can lead to overflow when users enter the spa.
As the spa fills, the water will activate the heating system. Initial heating can take several hours, depending on the ambient temperature and desired water temperature. Once filled, immediately begin the chemical balancing process (detailed in the next section) to ensure water safety and clarity. Regularly check for leaks during the filling process.
Chemical Balancing: Initial Setup
Upon filling, before your first soak, proper water chemistry is paramount. Begin by testing the water’s pH and alkalinity using a test strip or liquid test kit. Ideal pH levels should fall between 7.2 and 7.8, while alkalinity should be between 80 and 120 ppm. Adjust accordingly using pH increaser or decreaser, and alkalinity increaser.

Next, sanitize the water to eliminate bacteria and algae; A chlorine-based sanitizer is commonly used; follow the product instructions carefully for initial dosage. A shock treatment – a higher dose of sanitizer – is recommended for the initial setup to quickly establish a sanitation baseline.
After shocking, allow the water to circulate for at least 30 minutes before testing again. Maintain a consistent chlorine level of 1-3 ppm for regular use. Regularly monitor and adjust chemical levels to ensure a safe and enjoyable spa experience. Always follow chemical manufacturer’s safety guidelines.

Maintaining Water Chemistry
Consistent water chemistry is crucial for a hygienic and enjoyable Lay-Z-Spa experience. Test the water at least twice weekly, or more frequently with regular use, using a reliable test kit. Monitor pH, alkalinity, and sanitizer levels diligently. Adjust pH and alkalinity as needed to maintain the ideal ranges of 7.2-7.8 and 80-120 ppm, respectively.
Maintain sanitizer levels (chlorine or bromine) between 1-3 ppm. Regularly shock the water – typically weekly – to oxidize organic contaminants and prevent algae growth. After each use, and especially after heavy use, consider a smaller shock treatment.
Filter cleaning impacts water clarity and chemical effectiveness. Regularly use a water clarifier to enhance filtration. Partial water changes (25-50%) every 4-6 weeks help refresh the water and reduce the buildup of total dissolved solids. Always follow chemical product instructions carefully and prioritize safety.
Filter Cleaning and Replacement
Regular filter maintenance is paramount for optimal Lay-Z-Spa performance and water clarity. Rinse the filter cartridge with a garden hose – using a filter cleaning solution every other rinse – to remove debris and accumulated oils. Avoid using harsh detergents or abrasive cleaners, as these can damage the filter fabric.
Deep cleaning should occur monthly. Soak the filter overnight in a dedicated filter cleaning solution, then thoroughly rinse. Inspect the filter for any signs of damage, such as tears or collapsing pleats; A damaged filter reduces efficiency and can harbor bacteria.

Filter replacement is essential. Replace the filter cartridge every 4-6 months, depending on usage frequency and water quality. A clogged or worn-out filter strains the pump and compromises water hygiene. Always ensure the replacement filter is specifically designed for your Lay-Z-Spa model. Proper filter care extends the life of your spa and ensures a consistently clean and relaxing experience.
AirJet Massage System Operation
The AirJet massage system delivers a soothing, bubbling experience within your Lay-Z-Spa. Activation is simple: locate the AirJet button on your control panel and press it. The number of bubbles, and therefore the intensity of the massage, can often be adjusted by repeatedly pressing the button, cycling through low, medium, and high settings.
Energy-saving features are incorporated. The AirJet system typically has an automatic shut-off timer to conserve energy. Check your specific model’s manual for the default timer duration. Prolonged, continuous use can increase energy consumption and potentially overheat the system.
Troubleshooting AirJets involves checking the power supply and ensuring the filter is clean. A clogged filter restricts water flow, diminishing bubble production. Avoid using the AirJet system while adding chemicals, as this can cause uneven distribution and potential damage. Enjoy the therapeutic benefits of your Lay-Z-Spa’s AirJet massage system responsibly!

Troubleshooting Common Issues: Soggy Spa
A “soggy” Lay-Z-Spa indicates air is escaping, causing the spa to feel soft and lose heat. This is a common issue, often easily resolved. First, visually inspect the entire spa for any obvious punctures or tears in the liner. Pay close attention to seams and areas around the jets.
If a leak is found, a repair patch (usually included with your spa) can be applied following the manufacturer’s instructions. Ensure the area is clean and dry before applying the patch. If no visible leaks are present, the issue may stem from the inflatable structure not being firm enough.
Adding more air is the next step. Use the pump to reinflate the spa, listening for escaping air while doing so. Regularly check the pressure and add air as needed, especially during temperature fluctuations. Consistent monitoring and prompt attention to a soggy spa will maintain optimal performance and enjoyment.
Troubleshooting Common Issues: Error Codes
Lay-Z-Spa control panels display error codes to indicate specific issues requiring attention. Understanding these codes is crucial for efficient troubleshooting. E01 typically signals a flow issue, often caused by a clogged filter – clean or replace it. E02 indicates an overheating situation; reduce the temperature setting and ensure adequate ventilation.

E03 suggests a low-flow sensor problem, potentially due to airlocks. Try resetting the pump or gently tapping the pipes. E04 signifies a temperature sensor error, potentially requiring professional assistance. E05 often relates to a heater malfunction, also needing expert evaluation.
Consult your Lay-Z-Spa manual for a complete list of error codes and their corresponding solutions. Resetting the pump (turning it off and on) can sometimes clear temporary errors. If an error persists, contact Bestway customer support for further guidance and potential repair options. Ignoring error codes can lead to more significant damage.
Winterizing Your Lay-Z-Spa
Preparing your Lay-Z-Spa for colder months is vital to prevent damage. First, thoroughly clean the water and balance the chemistry as usual, then drain the spa completely. Remove the filter and store it indoors, cleaned and dry. Disconnect the pump and heater unit, bringing it inside for storage in a dry location.
Completely dry the spa liner to prevent mildew and cracking. Consider using a spa saver product designed to protect the vinyl during storage. Deflate the spa, but avoid tightly folding it, as this can cause creases. Store the deflated spa in a cool, dry place, protected from rodents and extreme temperatures.
Cover the spa securely during storage. Regularly check on the stored spa throughout the winter. Re-inflation in the spring requires a thorough cleaning and re-balancing of the water chemistry before use. Proper winterization extends the life of your Lay-Z-Spa.
Spa Cover Maintenance
Your Lay-Z-Spa cover is crucial for insulation, safety, and cleanliness. Regularly inspect the cover for any signs of damage, such as tears, cracks, or mildew. Clean the cover frequently with mild soap and water to remove dirt, debris, and chemical residue. Avoid harsh chemicals or abrasive cleaners, as these can damage the material.
To prevent mildew growth, ensure the cover is thoroughly dried before storing it. Consider applying a vinyl protectant to help repel water and UV rays, extending the cover’s lifespan; Regularly check the straps and buckles, ensuring they are secure and functioning correctly. Replace any damaged straps immediately.
Proper storage is key when the spa isn’t in use. Avoid placing heavy objects on the cover, as this can cause deformation; A well-maintained cover significantly contributes to energy efficiency and protects your investment; Inspect for sagging, indicating water absorption, and address promptly.

Safety Precautions and Guidelines
Prioritize safety when enjoying your Lay-Z-Spa. Never operate the spa without a properly grounded electrical connection. Supervise children closely at all times, as unsupervised access can be dangerous. Avoid using the spa if you are under the influence of alcohol or drugs, or if you have a medical condition that could be aggravated by heat.
Maintain appropriate water temperature; exceeding 40°C (104°F) can be hazardous. Individuals with heart disease, diabetes, or pregnant women should consult a physician before use. Regularly test the water chemistry to ensure proper sanitation and prevent the spread of bacteria. Never operate the pump if the water level is insufficient.
Be mindful of electrical safety – keep electrical devices away from the spa’s edge. Do not attempt to repair the pump or electrical components yourself; contact a qualified technician. Ensure the spa is positioned on a level surface to prevent tipping. Always disconnect the power before performing any maintenance or cleaning.
Leave a Reply