Rotator Cuff Band Exercises: A Comprehensive Guide
This guide details effective band exercises for rotator cuff rehabilitation and strengthening, offering a pathway to improved shoulder health and function.
Discover how targeted exercises, utilizing resistance bands, can alleviate pain and restore optimal movement within the shoulder joint.
Explore a comprehensive program designed to enhance rotator cuff muscle strength, stability, and overall shoulder performance, promoting long-term wellness.
Understanding the Rotator Cuff
The rotator cuff isn’t a single muscle, but a group of four muscles – supraspinatus, infraspinatus, teres minor, and subscapularis – surrounding the shoulder joint. These muscles and their tendons work harmoniously to enable a wide range of arm movements, providing stability and control.
Their primary function is to lift and rotate the arm, and to keep the head of the humerus (upper arm bone) securely within the glenoid cavity (shoulder socket). This crucial stability prevents dislocation and allows for fluid, pain-free motion.
Understanding the intricate interplay of these muscles is fundamental when designing an effective exercise program, like those utilizing resistance bands. Strengthening these muscles not only improves shoulder function but also supports surrounding structures, contributing to overall shoulder health and preventing future injuries.
Proper rehabilitation focuses on restoring this balance and function.
What is the Rotator Cuff?
The rotator cuff is a group of four distinct muscles – the supraspinatus, infraspinatus, teres minor, and subscapularis – that encircle the shoulder joint. These muscles, along with their tendons, form a functional unit responsible for shoulder movement and stability. They originate from the scapula (shoulder blade) and attach to the humerus (upper arm bone).
Their collective action allows for a full range of motion, including lifting, rotating, and stabilizing the arm. The supraspinatus initiates arm abduction (lifting away from the body), while the infraspinatus and teres minor handle external rotation. The subscapularis contributes to internal rotation.
Crucially, the rotator cuff maintains the humeral head within the glenoid fossa, preventing dislocation. Effective exercise programs, including those using resistance bands, aim to strengthen these muscles, restoring optimal shoulder mechanics and reducing pain.
A healthy rotator cuff is vital for everyday activities.
Common Rotator Cuff Injuries
Rotator cuff injuries are remarkably prevalent, often stemming from overuse, repetitive motions, or acute trauma. Tendinitis, an inflammation of the rotator cuff tendons, is a frequent complaint, causing pain and limited range of motion. Bursitis, inflammation of the bursa (fluid-filled sac) cushioning the tendons, often accompanies tendinitis.
More severe injuries include partial or complete tears of one or more of the rotator cuff tendons. These tears can occur gradually over time or suddenly due to a forceful event. Symptoms range from mild discomfort to significant weakness and inability to lift the arm.
Impingement syndrome, where tendons are compressed within the shoulder joint, is also common. Resistance band exercises, when performed correctly, can help address these issues by strengthening supporting muscles and improving shoulder mechanics, aiding in recovery and preventing re-injury.
Early intervention is key to managing rotator cuff problems.
Benefits of Band Exercises for Rotator Cuff
Resistance band exercises offer a safe and effective method for rotator cuff rehabilitation and strengthening. Their portability and adjustable resistance make them ideal for home exercise programs. Bands provide consistent tension throughout the range of motion, promoting muscle activation and endurance.
These exercises enhance shoulder stability by strengthening the muscles responsible for controlling arm movement. Improved stability reduces the risk of further injury and improves functional capacity. Bands allow for targeted strengthening of specific rotator cuff muscles – supraspinatus, infraspinatus, teres minor, and subscapularis.
Furthermore, band exercises can alleviate pain, improve posture, and restore optimal shoulder mechanics. They are a low-impact option suitable for individuals at various fitness levels, facilitating a gradual return to activity.
Consistent use yields noticeable improvements in shoulder function.
Essential Equipment & Preparation
Before beginning, gather resistance bands and a stable anchor point. Proper preparation ensures safe and effective exercise, maximizing results and minimizing injury risk.
Choosing the Right Resistance Band
Selecting the appropriate resistance band is crucial for effective rotator cuff exercises; Bands come in various resistance levels, typically color-coded for easy identification. Beginners should start with lighter resistance – yellow or red – to focus on proper form and avoid overstressing the muscles.
As strength improves, gradually progress to bands with higher resistance, such as blue or black. Consider the band’s material; latex bands are common but may cause allergies, so non-latex options are available.
Ensure the band is free from cracks or tears before each use. A band with sufficient length is also important to allow for a full range of motion during exercises. Ultimately, the best band is one that challenges your muscles without compromising your technique or causing pain.
Band Resistance Levels Explained
Resistance bands offer varying levels of tension, typically categorized by color. Extra light (yellow) provides minimal resistance, ideal for initial rehabilitation or individuals with very low strength. Light (red) offers a slight challenge, suitable for beginners focusing on form.
Medium (blue) provides moderate resistance, appropriate for building foundational strength. Heavy (black) offers significant resistance, for those with established strength seeking further gains.
Extra heavy (silver/gold) delivers the highest resistance, intended for advanced users. It’s vital to choose a level where you can perform exercises with controlled movements through a full range of motion, experiencing fatigue by the end of the set. Progress gradually, increasing resistance only when you can comfortably complete the prescribed repetitions.
Warm-up Exercises Before Starting
Prior to initiating rotator cuff band exercises, a thorough warm-up is crucial to prepare the shoulder muscles and joints. Begin with 5-10 minutes of light cardio, such as arm circles – forward and backward – to increase blood flow.
Follow this with dynamic stretches, including shoulder rotations, cross-body arm stretches, and pendulum swings. These movements enhance flexibility and range of motion.
Perform gentle internal and external rotations without the band to activate the rotator cuff muscles. A proper warm-up minimizes the risk of injury and optimizes exercise effectiveness. Focus on controlled movements and avoid pushing beyond your comfortable range.

Specific Rotator Cuff Band Exercises
Explore targeted exercises like external rotation, internal rotation, scaption, rows, pull-aparts, and overhead presses, utilizing resistance bands for optimal results.
External Rotation with Band
To perform external rotation with a band, secure the band to a stable object at elbow height. Hold the band with your elbow bent at 90 degrees and tucked into your side. Slowly rotate your forearm outward, keeping your elbow stable and close to your body.
Focus on squeezing your shoulder blade slightly back and down during the movement. Control the rotation throughout the entire range of motion, avoiding any jerky movements. Return slowly to the starting position.
This exercise primarily targets the infraspinatus and teres minor muscles, crucial components of the rotator cuff responsible for external rotation and shoulder stability. Aim for 10-15 repetitions for 2-3 sets, adjusting band resistance as needed to maintain proper form and challenge the muscles.
Internal Rotation with Band
For internal rotation, anchor the resistance band securely to a stable object, positioning it at elbow height. Grasp the band with your elbow bent at 90 degrees and held close to your side. Slowly rotate your forearm inward, across your body, maintaining a stable elbow position.
Concentrate on keeping your shoulder blade neutral and avoiding any forward shoulder movement. Control the motion throughout the entire range, resisting the band’s pull. Return to the starting position with a controlled movement.
This exercise primarily strengthens the subscapularis muscle, a key rotator cuff muscle responsible for internal rotation and shoulder stability; Perform 10-15 repetitions for 2-3 sets, adjusting the band’s resistance to challenge your muscles while maintaining proper form.
Scaption with Band
To perform scaption with a band, stand with your feet shoulder-width apart, anchoring the band under your foot on the same side as your working arm. Hold the band’s handle with your arm straight, but not locked, and thumb pointing upwards.
Raise your arm at a 30-45 degree angle forward of your body – this is the scaption plane – keeping your arm straight throughout the movement. Avoid shrugging your shoulder or rotating your arm. Focus on initiating the movement from your shoulder, not your arm.
Slowly lower your arm back to the starting position with control. This exercise targets the supraspinatus and strengthens shoulder abduction. Aim for 10-15 repetitions for 2-3 sets, adjusting band resistance as needed.
Rows with Band (for Posterior Cuff)
Band rows effectively target the posterior rotator cuff muscles, crucial for shoulder stability and preventing imbalances. Secure the resistance band around a stable object at chest height. Sit or stand with good posture, holding the band’s ends with your elbows bent and close to your body.
Pull the band towards your body, squeezing your shoulder blades together. Maintain a straight back and avoid twisting. Focus on using your rear deltoids and rhomboids to initiate the pull, not your biceps.
Slowly return to the starting position, controlling the band’s resistance. Perform 10-15 repetitions for 2-3 sets, selecting a band that provides appropriate challenge.
Band Pull-Aparts
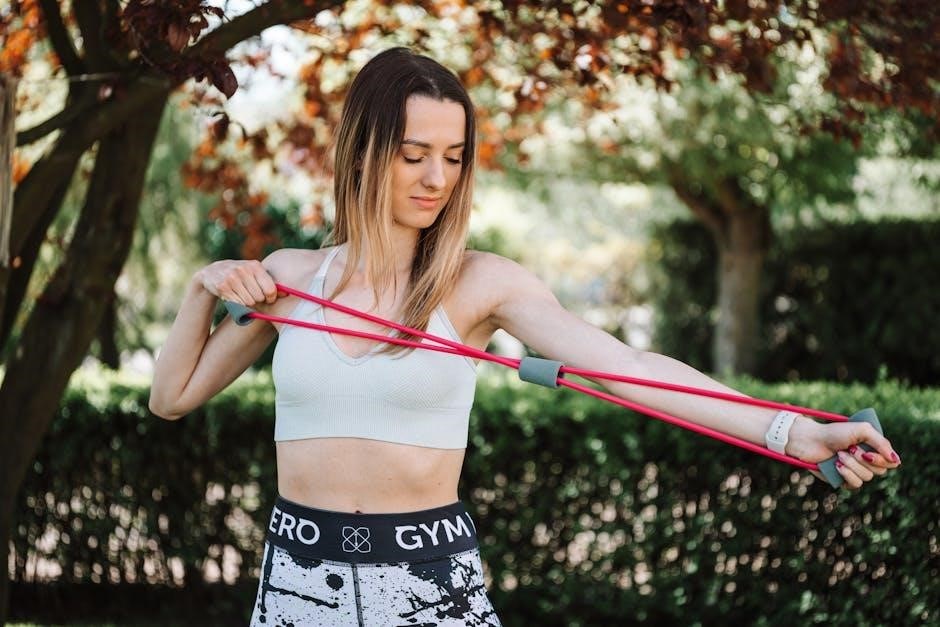
Band pull-aparts are excellent for strengthening the rear deltoids, rhomboids, and external rotators – vital for rotator cuff health and posture. Hold a resistance band with both hands, arms extended straight out in front of you at shoulder height, palms facing each other.
Keeping your arms straight (but not locked), pull the band apart by squeezing your shoulder blades together. Focus on initiating the movement from your upper back, not just your arms. Maintain a controlled motion throughout the exercise.
Slowly return to the starting position, resisting the band’s pull. Aim for 15-20 repetitions for 2-3 sets, choosing a band that challenges you without compromising form.
Overhead Press with Band
The band overhead press effectively targets the deltoids and upper trapezius, contributing to overall shoulder stability and strength. Secure a resistance band under your feet, then grasp the ends with your hands, palms facing forward, elbows bent at 90 degrees at shoulder height.
Press the band upwards, extending your arms overhead in a controlled manner. Avoid locking your elbows at the top of the movement. Maintain a stable core and good posture throughout the exercise, preventing arching of the back.
Slowly lower your arms back to the starting position, resisting the band’s pull. Perform 10-15 repetitions for 2-3 sets, adjusting band resistance as needed.

Exercise Technique & Form
Prioritize precise form during each exercise to maximize effectiveness and minimize injury risk, ensuring proper muscle engagement and optimal rehabilitation outcomes.
Proper Band Grip & Positioning
Achieving the correct grip and positioning with your resistance band is paramount for effective and safe rotator cuff exercises. Begin by securely holding the band, ensuring a firm but not overly tight grasp. Avoid gripping the band too close to the anchor point, as this increases resistance dramatically.
Position the band appropriately for each exercise, often looping it around a stable object or under your foot. Maintain a slight tension on the band even at the starting position to keep the muscles engaged. Your elbow should generally be bent at a 90-degree angle, and kept close to your body throughout most movements.
Consider the anchor point’s height; adjusting it alters the angle of resistance and targets different muscle fibers. Consistent positioning is key to progressive overload and tracking improvements. Incorrect grip or placement can lead to compensatory movements and potential injury.
Maintaining Correct Posture
Proper posture is absolutely crucial when performing rotator cuff band exercises to maximize effectiveness and prevent injury. Begin by standing or sitting with your back straight, shoulders relaxed, and core engaged. Avoid slouching or rounding your shoulders forward, as this compromises form and can exacerbate shoulder impingement.
Keep your head aligned with your spine, and maintain a neutral pelvic tilt. Your feet should be shoulder-width apart, providing a stable base of support. Throughout each exercise, consciously focus on maintaining this upright posture, resisting the urge to compensate with other muscle groups.
Imagine a string pulling you upwards from the crown of your head, promoting spinal elongation. Consistent postural awareness ensures the targeted muscles are doing the work, not your back or neck.
Controlled Movements & Avoiding Jerks
Executing rotator cuff band exercises with slow, controlled movements is paramount for safety and optimal results. Avoid any sudden jerks or ballistic motions, as these can strain the injured tissues and hinder the healing process. Focus on a smooth, deliberate range of motion throughout each repetition.
Concentrate on feeling the targeted muscles working – the external rotators, internal rotators, and scapular stabilizers. Resist the temptation to use momentum to complete the exercise; instead, rely on muscular strength and control.
A controlled tempo – typically two seconds for the concentric (lifting) phase, a brief pause, and three seconds for the eccentric (lowering) phase – is recommended. Prioritize quality over quantity, ensuring each rep is performed with precision and mindful awareness.
Breathing Techniques During Exercises
Proper breathing is crucial during rotator cuff band exercises to maintain stability and prevent unnecessary tension. Coordinate your breath with the movement pattern; generally, exhale during the exertion phase (when you’re actively working against the band’s resistance) and inhale during the recovery phase.
Avoid holding your breath, as this can elevate blood pressure and compromise form. A consistent breathing rhythm helps to engage your core muscles, providing a stable base for shoulder movement.
Focus on deep, diaphragmatic breathing – allowing your abdomen to expand with each inhale. This promotes relaxation and enhances oxygen delivery to the working muscles. Conscious breathing also aids in maintaining focus and control throughout the exercise session.
Creating a Rotator Cuff Exercise Program
Develop a structured plan with consistent frequency, sets, and repetitions, gradually increasing resistance as strength improves for optimal results.
Integrate these band exercises with other shoulder workouts, ensuring a balanced approach to rehabilitation and overall shoulder health.
Frequency & Sets/Reps
Establishing a consistent exercise schedule is crucial for rotator cuff rehabilitation. Aim for performing these band exercises 2-3 times per week, allowing for adequate rest and recovery between sessions. Initially, begin with 2-3 sets of 10-15 repetitions for each exercise. Focus on maintaining proper form throughout each repetition, prioritizing quality over quantity.
As your strength improves, you can gradually increase the number of sets to 3-4, or slightly increase the repetitions to 15-20. It’s important to listen to your body and avoid pushing through pain. If you experience any discomfort, reduce the number of sets or repetitions. Remember, the goal is to strengthen the muscles without causing further injury.
Progressive overload is key; however, it should be implemented cautiously. Don’t increase both sets and reps simultaneously. Start by increasing repetitions, then sets, and finally, resistance band level.
Progressive Overload: Increasing Resistance
Progressive overload is fundamental to continued rotator cuff strengthening. Once you can comfortably perform the prescribed sets and repetitions with good form, it’s time to increase the challenge; The primary method is to progress to a heavier resistance band. Bands are typically color-coded, indicating different resistance levels – yellow (lightest) to black (heaviest).
Transitioning to the next band level should be gradual. Ensure you can maintain proper technique with the new resistance. If form deteriorates, revert to the previous band. Another approach is to slightly decrease the range of motion initially, focusing on controlled movements.
Avoid increasing resistance too quickly, as this can lead to re-injury; Small, incremental increases are more effective and safer. Remember to prioritize quality of movement over the amount of resistance used.
Integrating with Other Shoulder Exercises
Rotator cuff band exercises are most effective when combined with a comprehensive shoulder rehabilitation program. Don’t isolate the rotator cuff; incorporate exercises targeting surrounding muscles like the deltoids, trapezius, and rhomboids. These muscles provide crucial support and stability.
Include exercises like rows, push-ups (modified if needed), and overhead presses – utilizing light weights or bodyweight initially. Focus on maintaining proper scapular control throughout all movements. Strengthening the scapular stabilizers is vital for optimal shoulder function.
Consider incorporating dynamic stretches to improve range of motion and flexibility. A well-rounded program addresses strength, stability, and mobility. Remember to listen to your body and avoid overtraining.
Safety Considerations & Precautions
Prioritize listening to your body; stop if you experience sharp pain. Gradual progression is key, and consulting a physical therapist ensures proper form and avoids injury.
Listening to Your Body & Pain Signals
Paying close attention to your body’s feedback is paramount during rotator cuff band exercises. A mild stretching sensation is acceptable, but sharp, sudden, or radiating pain is a clear signal to immediately stop the exercise. Ignoring pain can exacerbate existing injuries or create new ones, hindering your recovery progress.
Differentiate between discomfort from muscle fatigue and pain indicating tissue damage. Muscle soreness that develops gradually after exercise is normal, but pain during the exercise is not. Don’t push through pain; modification or cessation is crucial.
Be mindful of any swelling, increased warmth, or redness around the shoulder joint, as these can also indicate overexertion or injury. Respect your body’s limits and adjust the intensity or range of motion accordingly. Prioritizing safety ensures a successful and sustainable rehabilitation journey.
When to Stop an Exercise
Immediately cease an exercise if you experience any sharp, stabbing, or radiating pain during the movement; This isn’t simply discomfort; it’s a warning sign from your body indicating potential tissue damage. Continuing could worsen the injury and prolong recovery.
Stop if you notice any new or increasing swelling around the shoulder joint. Swelling suggests inflammation and overstressing the area. Also, halt the exercise if you feel a clicking, popping, or grinding sensation within the shoulder.
If you experience numbness or tingling in your arm or hand, discontinue the exercise and consult a healthcare professional. These symptoms could indicate nerve compression. Finally, stop if you feel a sudden weakness or inability to control the movement. Prioritize safety above all else.
Consulting with a Physical Therapist
A physical therapist (PT) provides invaluable personalized guidance for rotator cuff rehabilitation. They can accurately diagnose your specific injury, assess your range of motion, and identify muscle imbalances contributing to your pain.
A PT will design a tailored exercise program based on your individual needs and progress, ensuring proper form and technique. They can modify exercises to suit your current ability level and gradually increase the challenge as you improve.
Furthermore, a PT can address underlying biomechanical issues and provide education on posture, body mechanics, and injury prevention. Seeking professional guidance maximizes your recovery potential and minimizes the risk of re-injury, leading to long-term shoulder health.

Advanced Rotator Cuff Band Exercises
Progress beyond foundational exercises with challenging variations, enhancing stability and strength.
These advanced movements refine muscle control and promote optimal shoulder function for peak performance.
Explore complex techniques to unlock greater gains and accelerate your rehabilitation journey effectively.
Sleeper Stretch with Band Assistance
The Sleeper Stretch, when assisted with a resistance band, is a valuable exercise for improving internal rotation and addressing posterior capsule tightness in the shoulder. Begin by lying on your side with the affected shoulder down, elbow bent at 90 degrees, and forearm across your body. Secure a resistance band around your upper arm, anchored by your opposite hand or a stable object.
Gently pull the band to encourage a deeper stretch, feeling it in the back of your shoulder. Maintain a relaxed shoulder and avoid shrugging. Hold this position for 20-30 seconds, breathing deeply. Repeat 2-3 times. Important considerations include avoiding overstretching and stopping if you experience sharp pain.
This stretch is particularly beneficial for individuals with limited internal rotation or those recovering from shoulder impingement. The band assistance allows for a controlled and progressive stretch, enhancing flexibility and range of motion. Always prioritize proper form and listen to your body’s signals.
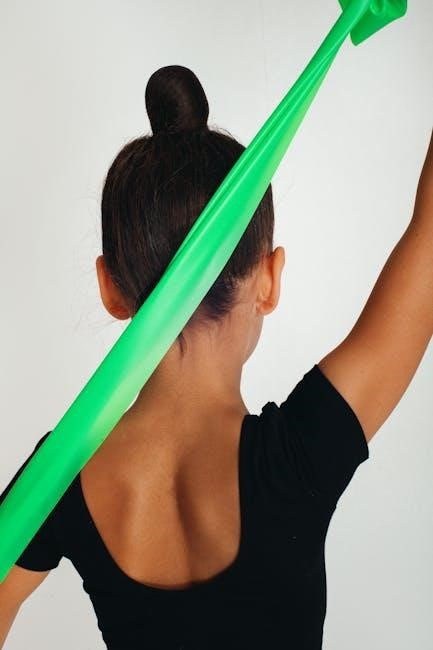
Prone Horizontal Abduction with Band
Prone Horizontal Abduction with a resistance band effectively targets the posterior deltoid and external rotator cuff muscles, crucial for shoulder stability and function. Begin by lying face down on a bench or the floor, with your arm hanging down towards the floor. Secure a resistance band around your wrist, anchoring the other end under your opposite arm or a stable object.
Keeping your elbow straight, slowly lift your arm out to the side, maintaining a controlled movement. Focus on squeezing your shoulder blade towards your spine. Hold the abducted position for a brief moment, then slowly return to the starting position. Repeat 10-15 times for 2-3 sets.
Ensure your movements are slow and deliberate, avoiding any jerky motions. This exercise is excellent for strengthening the muscles responsible for external rotation and preventing shoulder impingement. Prioritize proper form and stop if you experience any pain.
Leave a Reply