
The Canon Rebel XSi (EOS 450D) is a popular DSLR, offering a user-friendly experience with readily available manuals and digital downloads for guidance․
What is the Canon Rebel XSi?
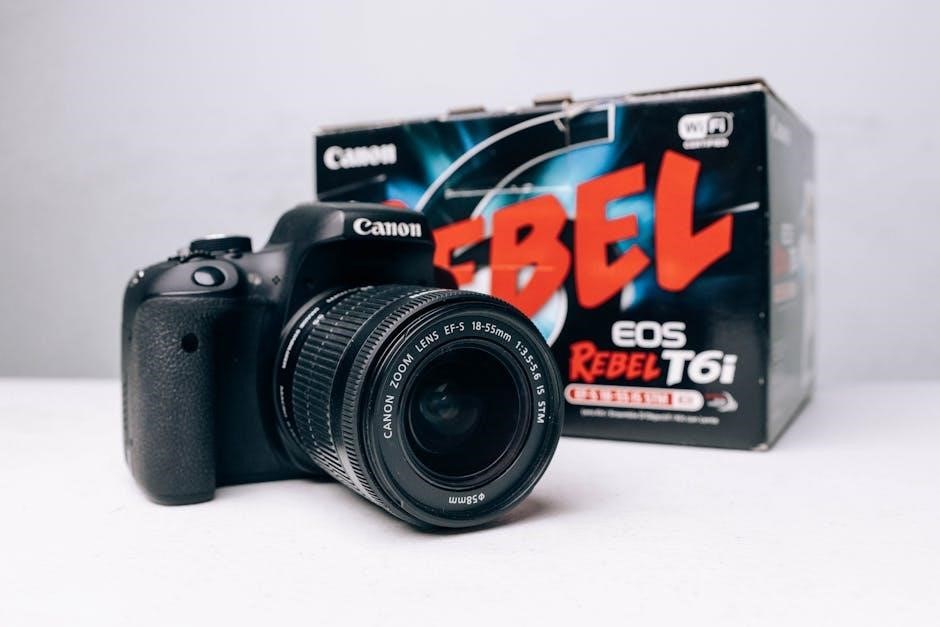
The Canon Rebel XSi, also known as the EOS 450D, is a 12․2-megapixel digital single-lens reflex (DSLR) camera released in 2008․ It quickly became a favorite among photography enthusiasts and those stepping up from point-and-shoot cameras․
This camera represents a significant entry point into the world of interchangeable lenses and manual controls․ Numerous resources, including free downloadable PDF manuals from sites like the Internet Archive, are available to help users master its features․ Original user instruction manuals can even be found for purchase on platforms like eBay․
The XSi’s appeal lies in its balance of affordability, image quality, and ease of use, making it a fantastic subject for a comprehensive user guide․
Key Features and Specifications
The Canon Rebel XSi (EOS 450D) boasts a 12․2-megapixel CMOS sensor, delivering detailed images․ It features a DIGIC 3 image processor for fast performance and excellent image quality․ A 9-point autofocus system ensures sharp focus, while continuous shooting reaches 3․5 frames per second․
Key specs include an ISO range of 100-1600 (expandable to 3200), and the ability to record standard definition video․ The 3․0-inch LCD screen provides clear image review․
Users can find detailed specifications within the original user manuals, often available as digital downloads or physical copies․ These resources, like those found on Etsy, provide a complete overview of the camera’s capabilities․
Target Audience for this Guide
This guide is designed for both beginner and intermediate photographers using the Canon Rebel XSi (EOS 450D)․ It caters to individuals seeking to understand their camera’s features beyond automatic modes, and those wanting to improve their photographic skills․
Whether you’ve just purchased a used XSi, or are revisiting it after a break, this resource will help․ It’s also beneficial for those who may have lost their original instruction manual, as readily available downloads exist, like those offered on Etsy and the Internet Archive․
We aim to demystify the camera’s functions and empower users to take creative control․

Getting Started: Initial Setup
Begin by unboxing your Canon Rebel XSi, installing the battery and a compatible memory card, and configuring the initial settings like date and time․
Unboxing and Component Overview
Upon opening the box, you’ll find the Canon EOS Rebel XSi/450D camera body itself, alongside essential components for immediate use․ These typically include a battery pack, a battery charger, a neck strap for comfortable carrying, and a comprehensive user manual – available both in print and as a downloadable PDF․
You should also locate the necessary cables for connecting to a computer, usually a USB cable, and potentially an AV cable for video output․ Inspect the contents carefully to ensure all listed items are present and undamaged․ Familiarizing yourself with each component before proceeding will streamline the setup process and enhance your initial experience with this capable DSLR․
Installing the Battery and Memory Card
To begin, locate the battery compartment on the bottom of the Canon Rebel XSi․ Insert the supplied battery pack, ensuring it clicks securely into place․ Next, find the memory card slot, typically located on the side of the camera․ The XSi supports SD cards; gently insert a compatible card until it locks into position․
Proper installation is crucial for the camera to function․ Avoid forcing either the battery or the card․ Ensure the battery is fully charged before first use for optimal performance․ The memory card is essential for storing your photos and videos, so choose a card with sufficient capacity and speed for your shooting needs․
First-Time Camera Setup: Date, Time, and Language
Upon powering on the Canon Rebel XSi for the first time, you’ll be prompted to configure essential settings․ Begin by setting the correct date and time; this information is embedded in the image metadata for accurate organization․ Navigate through the menu using the directional buttons and the SET button to confirm your selections․
Next, choose your preferred language from the available options․ Accurate date/time and language settings are vital for proper image sorting and display․ These initial settings ensure your camera operates correctly and that your photos are properly tagged with relevant information․ Take your time and double-check your entries before finalizing․

Understanding the Camera Interface
The Canon Rebel XSi features a mode dial, menu system, and LCD screen for control․ Familiarizing yourself with these elements unlocks the camera’s full potential․
The Mode Dial: Shooting Modes Explained
The Canon Rebel XSi’s mode dial is central to operation, offering various shooting options․ Auto mode simplifies settings for beginners, while Program (P) allows some control over aperture and shutter speed; Shutter-priority (Tv) lets you set shutter speed for motion control, and Aperture-priority (Av) controls depth of field․
Manual (M) provides full creative control․ Scene modes like Portrait, Landscape, Sports, and Night optimize settings for specific situations․ A dedicated Movie mode enables video recording․ Understanding each mode empowers you to capture images tailored to your vision, moving beyond automatic settings for enhanced photographic expression․ Experimentation is key to mastering these options!
Navigating the Menu System
The Canon Rebel XSi’s menu system, accessed via the ‘MENU’ button, is logically organized into several tabs․ These include shooting settings, image quality, autofocus, custom functions, and setup․ Use the directional buttons to navigate and the ‘SET’ button to confirm selections․
Familiarize yourself with the menu structure to customize camera settings․ The menu allows adjustments to image size, ISO range, white balance, and picture styles․ Don’t hesitate to explore each option; a downloadable user manual can be invaluable for understanding each setting’s function․ Careful menu navigation unlocks the camera’s full potential․
Understanding the LCD Screen Display
The Canon Rebel XSi’s LCD screen provides crucial shooting information and image playback․ During live shooting, it displays settings like aperture, shutter speed, ISO, and remaining battery life․ A helpful grid overlay assists with composition․
In playback mode, the LCD allows zooming into images for detailed review․ The display also shows a histogram, aiding exposure assessment․ Menu navigation is also performed via the LCD․ Understanding the icons and information presented on the screen is key to effective camera operation and achieving desired results․ Refer to the manual for detailed explanations of each indicator․
Basic Shooting Techniques
Mastering fundamental techniques like focusing, exposure control (aperture, shutter speed, ISO), and metering modes unlocks the Canon Rebel XSi’s full potential․
Focusing Modes: One-Shot, AI Servo, and Manual Focus
The Canon Rebel XSi offers three primary focusing modes, each suited for different shooting scenarios․ One-Shot is ideal for stationary subjects; the camera focuses when you half-press the shutter button․ AI Servo (or Continuous AF) tracks moving subjects, continuously adjusting focus as they move – perfect for sports or wildlife․
Manual Focus (MF) gives you complete control, allowing precise adjustments via the lens focusing ring․ This is useful in low light or when the autofocus struggles․ Understanding when to utilize each mode is crucial for sharp, well-focused images․ Experiment with each setting to determine which best suits your photographic needs and the subject you are capturing․ Proper focus is paramount for image quality!
Aperture, Shutter Speed, and ISO: The Exposure Triangle
Mastering the exposure triangle – aperture, shutter speed, and ISO – is fundamental to photography with the Canon Rebel XSi․ Aperture controls the lens opening, affecting depth of field (blurry background vs․ sharpness)․ Shutter speed determines how long the sensor is exposed to light, impacting motion blur․ ISO measures the sensor’s sensitivity to light; higher ISOs are useful in low light but can introduce noise․
These three settings are interconnected․ Adjusting one requires compensating for the others to achieve a properly exposed image․ Understanding their relationship empowers creative control over your photos, allowing you to prioritize depth of field, freeze motion, or shoot in challenging lighting conditions․
Metering Modes: Evaluative, Partial, and Spot Metering
The Canon Rebel XSi offers three metering modes to help determine optimal exposure․ Evaluative metering analyzes the entire scene, ideal for general photography․ It’s a balanced approach, suitable for most situations․ Partial metering assesses light from a smaller area in the center, useful when the background is significantly brighter or darker than the subject․
Spot metering focuses on a very small area, providing precise exposure for a specific point․ This is best for challenging lighting, like backlit subjects․ Selecting the correct mode ensures accurate exposure, preventing underexposed or overexposed images․ Experimenting with each mode will help you understand their strengths․
Advanced Shooting Features
The Canon Rebel XSi unlocks creativity with Live View, picture styles, and RAW image capture, offering greater control and post-processing flexibility․
Using Live View Mode
Live View on the Canon Rebel XSi allows you to compose and review images using the camera’s LCD screen, rather than the optical viewfinder․ This is particularly useful for precise focusing, especially when using a tripod, or when shooting from awkward angles where using the viewfinder is difficult․
To activate Live View, simply select the Live View button on the back of the camera․ Within Live View, you can utilize various focusing methods, including FlexiZone – Single, FlexiZone – Multi, and Face Detection; The display also provides a helpful histogram for assessing exposure․ Be mindful that prolonged Live View usage can impact battery life and potentially cause the camera to warm up, as the sensor is constantly active․
Creative Filters and Picture Styles
Picture Styles on the Canon Rebel XSi allow you to customize the look of your images directly within the camera․ These pre-set options – Standard, Portrait, Landscape, Neutral, Faithful, and Monochrome – adjust sharpness, contrast, color saturation, and tone․ You can even create and save Custom Picture Styles to suit your preferences․
While the XSi doesn’t have extensive built-in filters like newer models, Picture Styles offer significant creative control․ Experimenting with these settings allows you to achieve different moods and aesthetics without post-processing․ Remember that shooting in RAW format provides greater flexibility for adjustments later, but Picture Styles are excellent for achieving a desired look straight from the camera․
Shooting in RAW vs․ JPEG
RAW and JPEG are distinct image file formats offered by the Canon Rebel XSi․ JPEG files are compressed, resulting in smaller file sizes, ready for immediate use and sharing․ However, this compression discards some image data, limiting editing flexibility․
RAW files, conversely, contain all the data captured by the sensor․ This provides significantly greater latitude for post-processing adjustments – exposure, white balance, and detail recovery – without quality loss․ RAW files are larger and require editing software to view and process․ For critical shots where maximum quality and editing control are desired, RAW is recommended․ For everyday snapshots, JPEG offers convenience․

Working with Flash
The Canon Rebel XSi features a built-in flash and compatibility with external flash units, offering options for enhanced illumination and creative control․
Built-in Flash Settings
The Canon Rebel XSi’s integrated flash provides convenient illumination in various shooting scenarios․ Access flash settings through the camera’s menu system, allowing adjustments for flash exposure compensation․ You can choose from several modes, including Auto, Manual, and Red-Eye Reduction․ Auto mode lets the camera determine the appropriate flash power, while Manual offers full control․
Red-Eye Reduction fires a series of pre-flashes to minimize the red-eye effect in portraits․ Flash exposure compensation adjusts the flash intensity, useful for balancing flash with ambient light․ Experiment with these settings to achieve optimal results in different lighting conditions․ Remember to consider the distance to your subject and the room’s reflectivity when adjusting flash power․
Using an External Flash Unit
Expanding beyond the built-in flash, the Canon Rebel XSi supports external flash units for enhanced control and power․ Attaching an external flash to the hot shoe unlocks advanced features like TTL (Through-The-Lens) metering for accurate exposures․ Explore options for off-camera flash, utilizing wireless triggers for creative lighting setups․
External flashes often offer adjustable power levels, zoom capabilities, and modeling lights․ The camera’s menu allows configuration of flash synchronization modes, including first-curtain, second-curtain, and high-speed sync․ Mastering these settings allows for freezing motion or creating dramatic light trails․ Remember to consult the external flash unit’s manual for specific instructions and compatibility details․
Flash Compensation and Synchronization
Fine-tuning flash output is achieved through flash compensation, adjustable within the Canon Rebel XSi’s menu․ This allows brightening or darkening the flash’s contribution to the overall exposure, crucial for balancing flash with ambient light․ Synchronization modes dictate when the flash fires relative to the shutter․
First-curtain sync fires the flash at the beginning of the exposure, freezing motion․ Second-curtain sync fires it just before the shutter closes, creating motion blur before the subject is frozen․ High-speed sync enables using faster shutter speeds than the camera’s flash sync speed, useful for overpowering sunlight․ Understanding these modes unlocks creative control over your images, preventing unwanted effects․
Reviewing and Managing Images
The Canon Rebel XSi offers playback modes for zooming and reviewing captured photos, alongside options to easily delete or protect images from accidental removal․
Playback Modes and Zooming
The Canon Rebel XSi provides several playback modes to review your captured images effectively․ Pressing the playback button (indicated by a triangle) allows you to scroll through your photos and videos directly on the LCD screen․ You can navigate using the directional buttons on the rear of the camera․
Zooming functionality is crucial for detailed inspection․ Within playback mode, utilize the zoom lever surrounding the multi-controller to magnify images up to 10x․ This enables precise assessment of focus and sharpness․ The zoom feature also allows panning around the magnified image, ensuring comprehensive review․ Remember to use the display off button to conserve battery during extended review sessions․
Deleting Images
The Canon Rebel XSi offers straightforward image deletion options․ Within playback mode, select the image you wish to remove․ Press the delete button (typically represented by a trash can icon)․ A confirmation window will appear, prompting you to confirm the deletion․ Be cautious, as deleted images are often unrecoverable!
You can delete images individually or utilize bulk deletion features․ To delete all images, select the “Delete All” option within the delete menu․ This is a powerful function, so exercise extreme care․ Always double-check your selection before confirming bulk deletions to avoid accidental loss of valuable photos․ Regularly backing up your images is highly recommended as a preventative measure․
Protecting Images from Accidental Deletion
The Canon Rebel XSi allows you to safeguard your cherished photos from unintentional erasure․ Within playback mode, select the image you want to protect․ Access the menu (often via the ‘Set’ button) and locate the ‘Protect’ function․ Enabling protection adds a key icon to the image thumbnail on the LCD screen․
Protected images cannot be deleted through the camera’s standard delete functions․ You can also protect all images on the memory card simultaneously․ Remember to unprotect images when you intend to delete them, or transfer them to another storage device․ This feature provides a simple yet effective layer of security against accidental data loss, ensuring your favorite memories remain safe․

Connecting to a Computer and Printing
Transferring images from your Canon Rebel XSi is easily achieved via USB cable or a card reader, enabling seamless photo management and printing options․
Transferring Images via USB
Connecting your Canon Rebel XSi to a computer using a USB cable is a straightforward process for image transfer․ First, ensure your camera is powered off, then connect the USB cable to both the camera and an available USB port on your computer․ Power on the camera; a connection prompt should appear on the LCD screen․
Select the appropriate option – typically “Send images to computer․” Your computer should recognize the camera as a removable drive․ You can then browse the DCIM folder to locate your photos and videos․ Copy and paste these files to your desired location on your computer․ Remember to safely eject the camera from your computer before disconnecting the USB cable to prevent data corruption․
Using a Card Reader
A card reader offers a faster and often more reliable alternative to USB transfer for getting images off your Canon Rebel XSi’s memory card․ Simply remove the memory card from the camera and insert it into the card reader, which connects to your computer via USB․
Your computer will recognize the card reader as an external drive, allowing you to directly access the DCIM folder containing your photos and videos; Copy and paste the desired files to your computer․ This method bypasses the camera’s internal processing, potentially speeding up the transfer significantly, especially for large numbers of images or high-resolution videos․
Printing Options and Settings
Printing photos from your Canon Rebel XSi is straightforward․ You can print directly from your computer after transferring images via USB or a card reader․ Ensure your printer drivers are up-to-date for optimal compatibility․ When printing, consider paper type – glossy for vibrant colors, matte for softer tones․
Within your printer settings, explore options like borderless printing, color correction, and image quality․ Adjust these settings to achieve your desired print results․ You can also utilize Canon’s printing software, if available, for enhanced control and features․ Experiment with different settings to find what works best for your printer and paper combination․

Troubleshooting Common Issues
Common problems with the Canon Rebel XSi include power failures, focusing difficulties, and error messages; solutions are often found in the user manual․
Camera Not Turning On
If your Canon Rebel XSi fails to power on, begin with the simplest checks․ Ensure the battery is fully charged and correctly inserted into the battery compartment․ Try a different, known-good battery if possible, to rule out a battery issue․
Next, verify the memory card is properly seated․ Occasionally, a faulty or improperly inserted card can prevent the camera from starting․ Remove and reinsert the card․ Also, inspect the battery contacts within the camera and on the battery itself for any signs of corrosion or debris, cleaning them gently if necessary․
If these steps don’t resolve the issue, consult the comprehensive user manual for further troubleshooting steps or consider contacting Canon support for assistance․
Focusing Problems
Experiencing focusing issues with your Canon Rebel XSi? First, confirm you’ve selected the appropriate focusing mode on the mode dial – One-Shot for stationary subjects, AI Servo for moving subjects, or Manual Focus for precise control․ Ensure the autofocus point is positioned over your intended subject․
If using One-Shot, half-press the shutter button to activate autofocus․ Check the focus indicator in the viewfinder; it must illuminate green․ For AI Servo, continuously half-press and track the subject․ If the camera struggles to focus, try a different autofocus point or adjust the aperture for greater depth of field․
In low light, autofocus can be unreliable; consider using the built-in flash or an external light source․ Refer to the user manual for detailed explanations of each focusing mode․
Error Messages and Solutions
Encountering error messages on your Canon Rebel XSi? The camera’s LCD screen will display an error code, often accompanied by a brief description․ Common errors include “Err 90” (memory card issue – reformat or replace), “Err 05” (lens communication problem – reattach lens or clean contacts), and “Err 80” (card is full – delete images or use a new card)․
Consult the comprehensive error code list within the camera’s user manual for specific troubleshooting steps․ Often, simply turning the camera off and on again can resolve temporary glitches․ Ensure the battery is fully charged and the memory card is compatible․ If the error persists, consider contacting Canon support for assistance․
Leave a Reply